Showing posts with label beef. Show all posts

Saturday, March 3, 2012

Pel'Meni Russian Dumplings

There's this little hole in the wall sort of take out restaurant in Bellingham, WA (where I went to college).  I was introduced to this place late one Wednesday night after funk night at one of the local bars during my senior year in college.  At this magical little take-out spot there are only two options:  Beef or Potato dumplings.  One mouthful and I was hooked.  They were fantastic!  They were cheap!  They were the best post-bar food EVER!  I didn't remember what these things were called because everyone just called the shop, "The Russian Dumpling Place".  So I just knew the little bites of awesomeness as "russian dumplings".

Didn't Jon garnish his nicely?  Mine bowl did not look so good.  I must have been too excited to dig in!

A few weeks ago I was wasting time on facebook and I noticed my friend talking about something called "Pel Meni" and how amazing they were for dinner.  She thanked another mutual friend of ours for them.  So.....being the curious hungry pregnant lady that I am at the moment I happened to ask said friend, "Molly, what are pel meni?"  Lo and behold!!!  Pel Meni are russian dumplings!!!  SHE MADE THEM FROM SCRATCH!!!!  GAH! 

So Molly (as she described it to me) took on this personal challenge to find a great recipe for recreating the dumplings in our beloved Bellingham because our Campus Ministry Chaplain said something like, "You paid $5 for this plate?  I bet you could make these for $1 a plate!"  So the search began for the perfect recipe. 

Now dear readers, I pass the russian dumpling phenomenon on to you.  I'm not russian, I don't know anything about russian food, but these things are addicting!!!!

I will say though, tonight's pel meni making experience almost ended in pregnant lady food disaster tears.  I did not have such an amazing time making the dough for these dumplings.  I thought it would go faster if I made them in the food processor.  It probably would have, if I had added the water slowly, instead of adding the amount of water called for in the recipe as though that amount were set in stone.  To make matters worse, I was making a double recipe so that I could have some to freeze for an "I don't want to cook" sort of day.  UGH!!!  Just imagine a soupy mess!

This was also my first attempt at using the pasta roller I received for Christmas, which apparently doesn't have the most accurate dial settings!  Otherwise it works great!  Thanks Aimee!

But once I figured out the pasta roller, added another 2 cups of flour, and kneaded that chunk of dough until my arms hurt, we were in business. 

So a few tips on the dough.  Don't add all the water at once!!!  Add the water little by little until you get a dough that just comes together and isn't sticky.  If it gets too sticky and doesn't roll out properly add more flour little by little.  It should come together well in the food processor, just be careful about the water!!  I can't stress it enough.  When Clare saw the dough in a bowl after it had been made she asked, "Mama what's that sauce?"  That will give you an idea of how horribly wet it was to start out when I added the full amount of water.

See how sticky it looks?  Not good!
Other than that, happy dumpling making!  It goes much faster when you have someone helping!  Jon got really into it by the time we finished.


Pel'Meni Russian Dumplings
Adapted from HERE

Ingredients
dough
1 1/2 cups flour + extra for rolling and consistency
2 eggs
1/4c water (start slowly!!!!  Just watch the consistency of your dough! The original recipe said 1/2c!)
1/2 tsp salt

filling
1/2 lb  ground beef
1/2 lb  ground pork 
2 red onions minced
2 cloves of garlic minced
salt and pepper to taste

topping (sort of like the Bellingham place's toppings)
2tsp Sriracha sauce
2tbsp red wine vinegar
generous sprinkling of curry powder
sprinkling of cilantro
serve with sour cream!


Method:
1.  In a food processor combine flour and salt.  Add eggs one at a time pulsing to combine with flour.  (You can do this by hand on a board, or in an electric mixer with a dough hook as well.)

2.  Add water one tablespoon at a time, pulsing until you get a dough ball that comes together without being too sticky. 

3.  Take out the dough and knead it by hand until it comes together nicely.  Let it rest for 30 minutes.
I had to add about another cup of flour at this point.  It was much too sticky. 

4.  Combine all the filling ingredients and mix well!  
I recommend using your hands for this.  Everything seems to stick together better when you're doing it by hand rather than by spoon.

5.  Roll out your dough in sections with a pasta roller or by hand.  Cut out 2 inch circles.  Alternatively you could pinch off dough balls and roll out each one.  Make sure you put some parchment paper in between layers of dough circles so that they don't stick to each other!  I was not so smart about this.
The bottom layer of dough circles stuck togeher horribly.  They'll get rolled out again tomorrow after the dough scraps have rested more.

6.  Fill half of each piece of dough with a lump of filling (maybe a tablespoon) and fold half over creating a semi circle.  Pinch the edges together and bring the sides together and tuck them under.  They'll look like giant tortelloni.
7.  When you've filled all your dough circles boil the pel meni in salted boiling water for 7-10 minutes until the pel meni are floating to the top. 

Enjoy with all the toppings!!  Don't skimp on the curry powder or sour cream!

I'm going to have to find a recipe for the potato version of these for Fridays in lent.  I expect that the recipe would be something like hungarian perogies. 


In the name of the Father, the Son, and the Holy Spirit, Amen.
Dear Heavenly Father,
  thank you for fun college experiences and great friends.  Help us to continue to support each other in our faith and lives after college.  Amen.

Monday, January 30, 2012

Boeuf Bourguignon or should I call it Boeuf Merlot?

Hi.  I know, I know.  It's been like 3 weeks.  But hey, great news!  I passed my 3hr glucose tolerance test!  I don't have gestational diabetes!!  Woohoo!!

Other than that, we haven't been sick or anything, but my child did get an enormous wound on her head that required a trip to the ER and a billion (well okay, 8) stitches, and xray, and a CAT scan last week.  How's that for too much excitement to blog?

We've been having a lot of repeat recipes and things made with ground beef......

But tonight I went for it.  I made Boeuf Bourguinon.  Well, kind of.  I thought I was going to get really fancy and make Julia Child's recipe for it.  If you want to do that you can go HERE.  But after examining the recipe for a few minutes I decided to save that for a weekend.  Maybe for a special occasion.  It's really involved and it required bacon (which I only had a bit of) and beef broth or bouillon (which I didn't have).  So I did the next best thing.  Well, another good thing.

I used Anthony Bourdain's recipe loosely.  I didn't have a bouquet garni laying around, so I had to use some dried herbs.  I also messed with the quantities a little bit because I wasn't making a huge batch of stew, but I still wanted lots of carrots.  I also added mushrooms because I thought they'd taste great and Julia's recipe had mushrooms too.  Oh, and I used regular stew meat.  I have no idea what part of the cow stew meat comes from, so I can't say if it's the shoulder or neck like Anthony recommends.

I did something that both chef's would probably scoff at though.  I didn't actually use Bourguinon, that's Burgundy for all you non French speakers.  Yeah, I used Merlot.  I couldn't find any cheap Burgundy at the grocery store, so I went with a Merlot.  Let's face it, I'm not going to shell out a ton of cash on a nice Burgundy from France on a weeknight meal.  Now if I decided to go with Julia's incredibly involved and probably amazing recipe and I were making it for some beloved company on a weekend, then yeah, I'd find the Burgundy.  But hey, I'm on a budget.  Forgive me professional chefs, forgive me.

So here's what I did. 

Boeuf Bourguignon
adapted from Anthony Bourdain's Boeuf Bourguinon recipe


Ingredients

1lb beef stew meat
1 1/2cups water(or more)
6oz red wine (preferable Burgundy, I used Merlot)
1 garlic clove minced
2-3 tbsp oil (I used coconut and a little butter)
1 large onion diced
1tbsp all purpose flour
3 carrots cut into chunks
1cup crimini mushrooms halved
1tsp dried parlsey
1tsp dried thyme
1 bay leaf
salt and pepper to taste


Method

1.  Season your stew meat with salt and pepper.

2.   Heat the oil on medium high on a dutch oven.  When you're sure the pot is very hot, add a third to half of your beef pieces.  Don't overcrowd the pot or else it will get too cold and the beef won't brown nicely.  You're looking for a dark caramel sort of crust.


3.  After you've browned all your meat, set it aside and add the onions to your pot.  Lower the temp a little so they don't burn quickly.  You'll want to saute them until they're tender and translucent.  Don't worry about the brown stuff on the bottom of the pot, you want that.  If you need a bit more oil you can add that too.  I think I added a tiny bit of butter and oil.

4.  Once your onions are soft, add the flour and mix to incorporate. 

5.  Add the red wine and stir the pot to loosen all the brown bits at the bottom (deglaze it!).  Bring the wine up to a boil.

6.  Put the beef back in the pot and add the carrots, garlic, herbs and water.  Anthony Bourdain says you're looking for a ratio of 3 parts liquid to 2 parts meat.  So eyeball it.  My measurement for water is approximate. 

7.  Bring it up to a boil, then reduce the heat and let it simmer for 2 hours until the beef is tender enough to mash it with a fork.  Check it every 15 to 20 minutes to make sure you still have plenty of liquid and that nothing is sticking and burning to the bottom of your pot.

8.  After about an hour and a half of simmering add your mushrooms.

9.  Taste and season with salt and pepper before serving.  Voila!


In the name of the Father, the Son, and the Holy Spirit.  Amen.
Dear Heavenly Father,
  thank you for a week full of blessings.  Please help our little girl continue to heal well.  Please help the crazy blog writer to stay healthy through this pregnancy.  Please help us this week with our special intention!!!  Amen.
Monday, January 9, 2012

Beef and Mushroom Tart

So keeping with the lower carb meals tonight I present something mildly experimental.  I got this recipe from my mom a long time ago.  It's actually an hors d'oeuvre that we make for parties, but tonight I thought I'd try a bigger version and just make it into a meat pie/tart type of thing.  I think it turned out pretty well. 

Since I'm trying to keep the carbohydrate count low so I can pass this next 3 hour gtt I had to make a few changes to the recipe.  I don't actually know where she got the recipe for this, so hopefully it's okay that I'm posting a modified version. 

In the original recipe if you were going to make these as  hors d'oeuvres for a party you would smash slices of bread into muffin cups to use as tart shells and use a can of condensed cream of mushroom soup along with the other ingredients in the filling. 

For tonight's recipe I made my own whole wheat pie crust (so that'd be about 10-12 grams of carbs for 1/8 of the pie).  I didn't use the cream of mushroom soup, but used real mushrooms and thickened up some milk with some parsley and a bit of added garlic powder and onion powder instead.  If I had used the cream of mushroom soup 2 things would have happened:
1.  It would have tasted better.
2.  It would have had 6.75 more grams of carbs per slice (assuming you had 1/8th) of pie. 
Since I was planning on eating more than 1/8th of the pie I decided to skip the soup.  If you're not so worried about carbs I'd definitely say use the condensed soup (get the organic kind without msg!!). 

Otherwise, on it's own this was pretty good!  I had the flavor of the hors d'oeuvres in my head, so this pie wasn't as amazing as those, but not too shabby for a low carb, weekday meal. 

Here's the recipe if you want to make it!


Beef and Mushroom Tart

Ingredients
(Pie Crust)
1 1/3c whole wheat flour
1/2c butter cubed
1/2 tsp salt
3tbsp cold water

(filling)
1lb ground beef
1cup mushrooms diced
1/2 green pepper diced
1 small onion diced
3large cloves of garlic minced
1tbsp butter
1cup milk
1tbsp flour
1tbsp parsley
salt and pepper to taste
garlic powder and onion powder to taste
1/3cup cheddar cheese grated

For the filling:
1.  Brown the ground beef. If you're not using lean meat drain off some fat.
2.  Add the mushrooms, green pepper, onion, garlic and butter and saute on medium heat until the onions are translucent and the green peppers are soft. 
3.  Sprinkle the flour over the beef and veggie mixture and stir it in. 
4.  Add the milk and bring everything to a boil over medium heat.  Allow the sauce to get thick and bubbly.
5.  Add the parsley, salt and pepper, and garlic powder and onion powder if you think it needs a bit more kick.  Stir everything to combine well.
6.  Take the mixture off the heat and cool down a bit.

For the crust:
1.  Combine the flour and salt in a food processor.  Just pulse it a couple times.
2.  Add the cubes of butter slowly while pulsing. 
3.  When the flour and butter look like coarse crumbs add the cold water slowly.
4.  When it comes together into a ball it's ready to roll out.
5.  Roll out the dough on a floured board until it's larger than the pie plate. 
6.  Carefully place your dough in the pie plate.  Roll the edges over and if you want to be fancy flute the edges. 
7.  Prick the bottom of the crust and bake in a 400 degree oven for about 25 minutes.

Bringing it together.
1.  When the pie comes out fill it with your beef and mushroom mixture and top with cheddar cheese.
2.  Bake in a 350 oven for 20 minutes!

Before it went in the oven!


The finished product.


 Hope you enjoy it!


In the name of the Father, the Son, and the Holy Spirit.  Amen.
Dear Heavenly Father,
Thank you for the Christmas Season and all of the joy that comes with celebrating your son's birth.  As we begin this New Year help us all to remember the gift you have given us in your son and the gift of our lives.  Help us to remember not to squander what we've been given and appreciate it and cultivate it every day.  Amen.

Monday, November 14, 2011

Pesto Meatballs

This recipe came about because I wanted meatballs, and I wanted them with pasta, but I didn't want them with tomato sauce.   (I can't remember if I was pregnant when I concoted this recipe, but that sounds like a pregnant train of thought.  The fact that I can't remember also lends a compelling argument for the timing of this recipe creation.  Ha ha!)  I figured meatballs with alfredo sauce would be too weird, so by process of elimination, pesto was left!  Honestly, I was pretty skeptical that this would turn out okay because I don't think I had ever heard of a peso meatball before.  At that point I hadn't looked for a recipe on the internet.  In fact, I didn't actually look for pesto meatballs until the ones I made had already been eaten.  I did find some recipes for them, so I'm not that orginal (darn!).

So if you google pesto meatball recipe I'm sure you'll be able to find other recipes for this.  They might be better, I don't honestly know.  I do know that we like these, and I make them every other time I buy a huge container of basil. 


Pesto Meatballs

Ingredients
1lb ground beef
1 egg
1/2 cup breadcrumbs
1/2 cup onions minced
1/3 cup pesto sauce RECIPE HERE
1/4 cup milk
2 tsp black pepper
1tsp salt

Method
1.  Combine all ingredients in a large bowl and mix well.  I think it's best when you mix with your hands, but a wooden spoon should work as well.


All ready to go into the oven!

 2.  Form the meat mixture into balls.  The ones I made were probably 2 inches in diameter, maybe a bit larger. 

3.  Bake the meatballs on a rimmed baking sheet in a 350 degree oven for 30 minutes until there is no more pink inside. 

Serve with pasta and more pesto sauce! 


In the name of the Father, the Son, and the Holy Spirit, Amen.
Dear Heavenly Father,
  please bless the father of my friend Cory.  Bring him healing and bring comfort to his family.  Amen.

Thursday, November 3, 2011

Chile Colorado Con Carne

Tonight's post will be short.  I've spent the day dealing with a puking toddler who doesn't like to rehydrate.  Bah.....so....tired...


So I sort of revisited a new favorite.  Remember the red enchiladas?  Well I went in that direction, but we used beef tonight.  On the back of the New Mexico Chile powder packet I saw a recipe for Chile Colorado, so I did some searching online and found this recipe

Authentic Mexican Chile Colorado con Carne


Browning the beef.

After I added the pureed chiles in.  After this it was simmered for an hour and a half.

The finished product on my homemade tortillas.  Yum!


It looked easy enough and I had the right ingredients so I thought I'd try it.  Jon picked up some stew meat on his way home from work and two hours later we had an amazing dinner.  Jon agreed when I said, "It's restaurant quality good" after the first bite.  You'll have to try it and tell us if you agree. 

The only comments I'd make about the recipe are that when he says that you might have to add extra liquid, you will have to add it for sure!  I probably added another cup of water at least to make sure it didn't get too thick.  I also simmered it for about the right amount of time he specifies and the meat was nice and tender.  Good recipe! 

I think when you order Chile Colorado in restaurants it's usually served with rice and beans, but we just had it tonight with tortillas and some homemade guacamole (avocado, cilantro, onion, garlic, lime juice, sometimes jalapeno, whizzed together).  We're really getting attached to the red chile sauces around here. 

Try it out!

In the name of the Father, the Son, and the Holy Spirit, Amen.
Dear God,
  thank you for giving us natural remedies for toddler sicknesses.  Please help my little girl get over her stomach bug quickly.  Thanks Lord!  Amen. 

Monday, October 31, 2011

Chili

Tonight's dinner was incredibly easy to fix and can be a great crock pot dinner if you are organized early enough in the day.  Today I was not so organized, so it just simmered on the stove for an hour and a half.

There's not much of a history to this one.  I was just craving chili one day and I'd never made it before so I went hunting for a recipe on allrecipes.com.  The original recipe calls for turkey.  I have used turkey before and it has turned out well, but recently there have been a lot of contaminated ground turkey scares so I haven't bought any ground turkey for a while.  I think it also tastes a bit better with ground beef, so that's what I made tonight.

One of the great things about looking for recipes on recipe websites is that you can look at reviews.  I tweaked the original recipe a lot based on reviews I read from other people who had tried the recipe and I like the upgraded version much better. 

Usually (when I'm organized) I'll make a side of cornbread to go with the chili, but tonight since I was pretty out of it I just threw a bunch of corn into the chili.  I know, definitely not the same, but at least you still get that nice sweetness of the corn in there.  I also tried adding spinach tonight because I'm starting to really like sneaking spinach into things.  It worked well and added another vegetable serving in there!

Here's what I did.

Chili
adapted from Simple Turkey Chili recipe on allrecipes.com

Ingredients
1lb ground beef
1 medium onion diced
3 cloves of garlic minced
1 large carrot diced
2 anaheim chiles diced(I usually use 1 bell pepper, but I had the anaheims in the fridge and didn't want to waste them)
2 cups chicken broth (or beef broth should work well too)
1 can diced tomatoes
1 can kidney beans, rinsed and partially mashed
2 cups chopped spinach
1cup corn (I used frozen)
2 tblsp chili powder
1/2 tsp paprika
1/2 tsp dried oregano
1/2 tsp ground cumin
salt and pepper to taste
*the original recipe also had 1/2 tsp cayenne which is nice, but I leave it out now so that it's not spicy for the kiddos.  Jon still adds a dash after it's made.  Don't add the cayenne until the last minute if you're making it in a crock pot though!


Method
1.  Brown the ground beef in a large pot.

2.  Add the onion and saute with the beef until the onion is softened.


3.  Add the garlic, carrot and chiles and saute until the chiles start to soften.

4.  Add the spinach, tomatoes, beans, broth, and spices and mix well.  Bring it up to a boil on med-high heat and then lower the temperature and let it simmer for at least 40 minutes covered or more until all the veggies are tender. 
Spinach
Tomatoes and beans

Broth

Spices

5.  Take the lid off and add the frozen corn and simmer it for another 15 minutes to let some liquid evaporate so it's a thicker chili.

This works well in a crock pot too!  Just throw everything in a crock pot after step 3 and let it go all day.
It's very filling and has a lot of protein and fiber.  It's also nice with a bit of shredded cheddar on top.  Mmmm...

In the name of the Father, the Son and the Holy Spirit, Amen.
Dear God,
  please bless and protect all those out celebrating All Hallow's Eve tonight.  Keep them safe and help them remember the incredible Feast of All Saints tomorrow.  Amen.

Thursday, October 27, 2011

Chili crusted steak with cilantro butter and cheddar mashed potatoes

If you're thinking that you've read this somewhere before, you're not crazy.  This is what Jon had when we went on our date at The Stone House.  The only difference is that Jon had a filet mignon and there was asparagus and red pepper coulis.  Both the asparagus and filet mignon were too expensive at the moment and to be honest I forgot about the red pepper coulis.  Oh well. 

Unfortunately the recipe I got from the food network did not imitate the chili crusted masterpiece at Stone House at all.  It was still pretty tasty, but it was really spicy and didn't really have the same flavors.  Eh, what do you expect?  I am not a very experienced or trained chef with my own restaurant. 

I think if I had tried this on its own, not trying to imitate the best food I've ever tasted I would probably be more satisfied with this dish.  But all in all I think it was a decent attempt. 

We'll see what Jon thinks whenever he gets home from his 14+ hour day.  Darned software ...grrr....


The Recipe for the Chile Crusted Steak is Here.  It's from Bobby Flay.  I didn't use the filet mignons or the chili sauce with mushrooms.  I found some reasonably priced western grillers at the butcher shop on Tuesday so I thought I'd try those.  They were okay, I think if I tried this again I'd probably go with a Top Sirloin.  I might also try a different combination of chiles.  Maybe chipotle?  Hmmm...

I had to grind my own chile de arbol and pasilla chile powder.  Yay for the Magic Bullet.

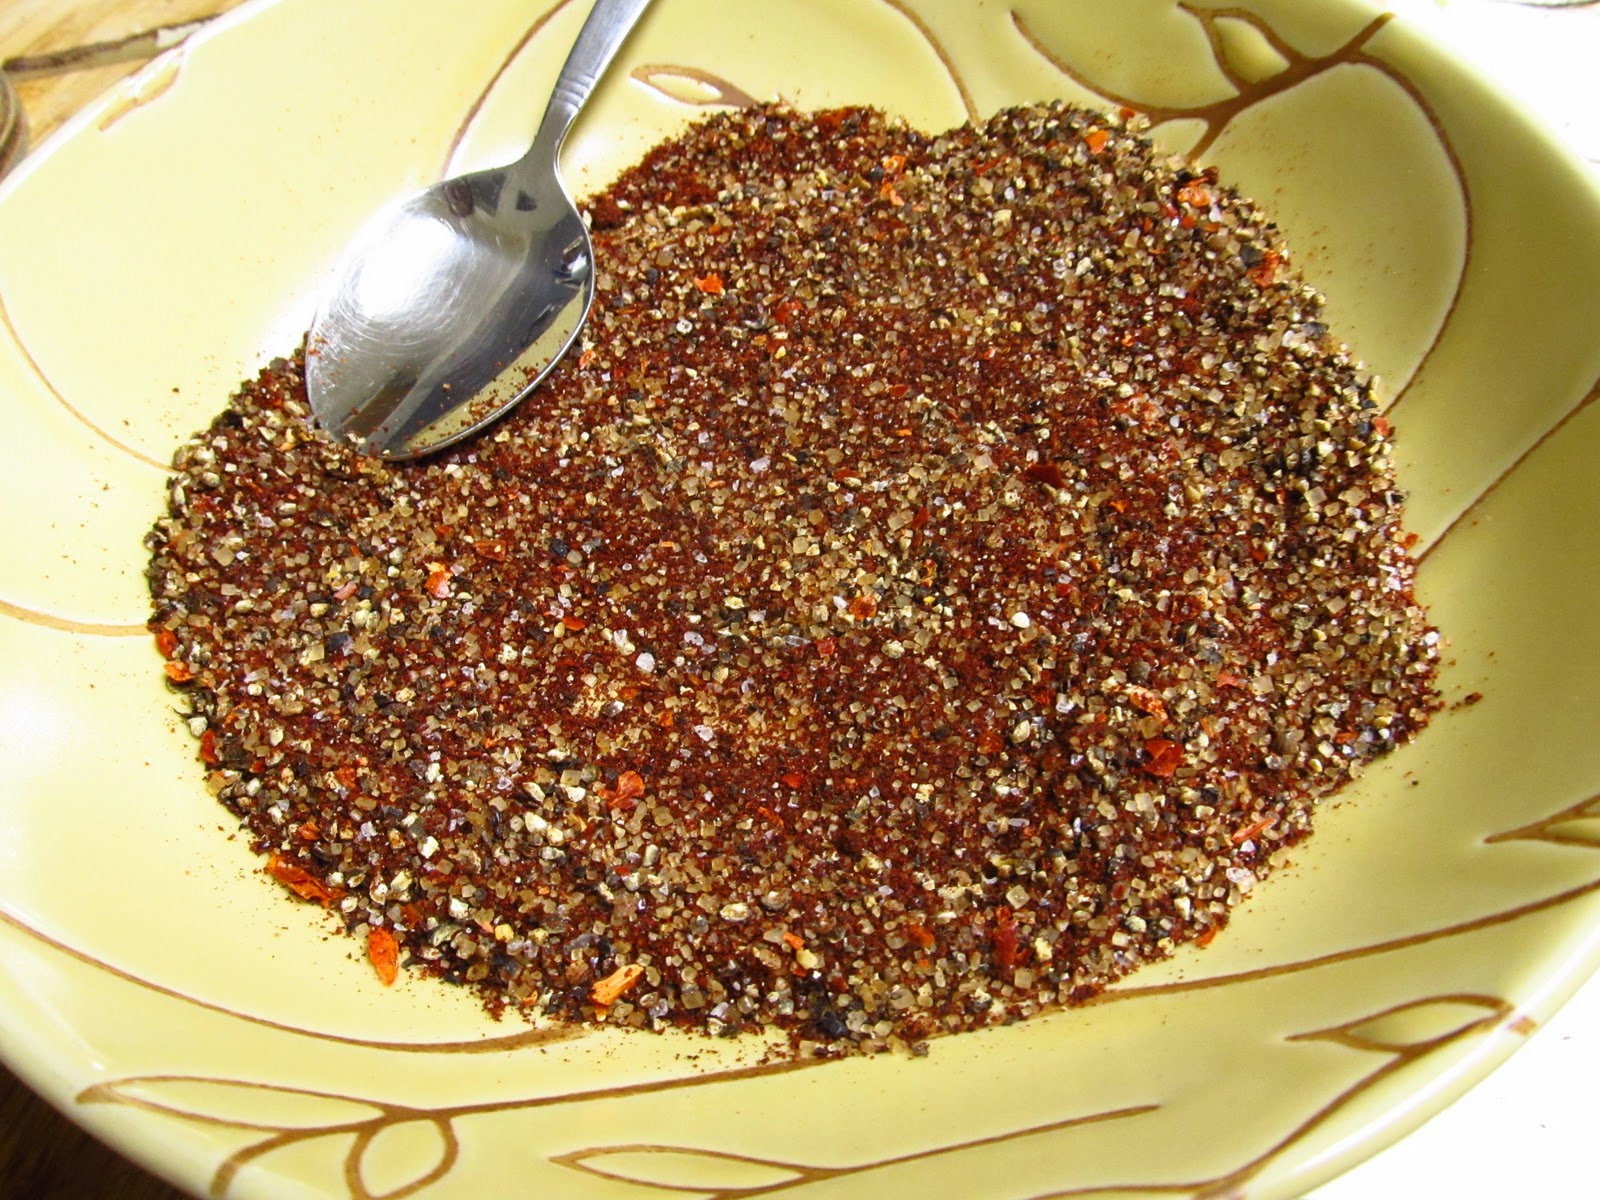
The spice mixture looked pretty cool.

Dredging the steak in the chile mixture.

Steak in the pan searing on the first side.  I cooked it for 5 minutes on the first side.

I did 7 minutes on the second side, but unfortunately I found out after a few bites that it wasn't enough.  My steak ended up being medium when I was going more for medium well.  I needed to return it to the pan for a few minutes.  This was pretty annoying especially after letting it rest for 10 minutes, but preggos probably shouldn't be eating bloody steaks.

For the cheddar mash I just used russets, butter, salt, and cheddar.  Sorry, no real measurements. 
I washed, cut, then boiled them and mashed with a good old potato masher.  I'm a little scared to use machinery with potatoes since the 3 or 4 times I have they've gone gluey.  Ick.


Cheddar mashed potatoes, sorry for the horrible shot.

For the cilantro butter I took about 5 tbsp of butter and a handful of fresh cilantro and threw them in the magic bullet.  I am not really sure what they did at the Stone House, but it was so much better than this.  Maybe more salt?  Or maybe it was fresh butter that they made at the restaurant.  Who knows.  Maybe someday if I get to be a famous food blogger I can go and pick at the chef's mind.


You may be thinking, geez that looks charred, but it wasn't burnt at all.  That's just what happens to the color of the chile powder after it's been seared.  No burnt taste I promise!

In the name of the Father, the Son, and the Holy Spirit, Amen.
Dear God,
  thank you for humbling moments.  Help us all to remember that it's not our actions or characteristics that give us value or dignity, but the sheer fact that we are made in your image and likeness and loved infinitely by you.  Amen.

Monday, October 17, 2011

Penne with Meat Sauce. aka Spaghetti sauce with different pasta.

Well tonight I get to give you an extremely basic recipe.  Cooking 101.
Spaghetti Sauce.

This is about as basic as I get people.  If I can muster up the energy to cook, but I still don't really want to cook, this is what is made 99% of the time. 

It's easy, it's satisfying, and most of the time I have ground beef in the freezer.

I don't think you're going to find anything fancy here, so if you're new to the kitchen, try this on for size.


Spaghetti Sauce
(I wouldn't know who to give credit to for this, maybe mom since this is close to the way she makes it)

Ingredients
1lb of ground beef
1can of tomato sauce
1 can of tomato paste
4 cloves of garlic minced
1/2 cup of red wine (I used water tonight because we didn't have any wine around)
2 bay leaves
1 tbsp oregano
salt and pepper to taste


Method
1.  Brown the ground beef in a pot on medium heat.  If there's a ton of fat drain that off.

2.  Add the garlic and saute for a minute or two.

3.  Add the bay leaves and oregano and mix until well combined.  Make sure to break up the ground beef well so you have even small pieces and not large chunks.

4. When the beef is completely browned add the tomato sauce and tomato paste.  Mix it all together until the texture is uniform and you can't see any more chunks of tomato paste. 

5.  Mix in the red wine, turn the heat down to low and let everything simmer for 20 minutes to half an hour stirring occasionally. 

6.  Add salt and pepper to taste and serve atop your favorite type of pasta.  Tonight we had penne.


If you're really on top of it, you can boil your pasta first in the same pot you use for the sauce.  Less dishes that way!!  Just make sure that when the pasta is drained you toss it with some extra virgin olive oil so it doesn't stick together.


In the name of the Father, the Son, and the Holy Spirit, Amen.
Dear Heavenly Father,
  please keep everyone safe amid all the "Occupy _____" protests.   Please help all the elected officials in these countries to do what is just and right.  Amen.