Showing posts with label pork. Show all posts

Saturday, March 3, 2012

Pel'Meni Russian Dumplings

There's this little hole in the wall sort of take out restaurant in Bellingham, WA (where I went to college).  I was introduced to this place late one Wednesday night after funk night at one of the local bars during my senior year in college.  At this magical little take-out spot there are only two options:  Beef or Potato dumplings.  One mouthful and I was hooked.  They were fantastic!  They were cheap!  They were the best post-bar food EVER!  I didn't remember what these things were called because everyone just called the shop, "The Russian Dumpling Place".  So I just knew the little bites of awesomeness as "russian dumplings".

Didn't Jon garnish his nicely?  Mine bowl did not look so good.  I must have been too excited to dig in!

A few weeks ago I was wasting time on facebook and I noticed my friend talking about something called "Pel Meni" and how amazing they were for dinner.  She thanked another mutual friend of ours for them.  So.....being the curious hungry pregnant lady that I am at the moment I happened to ask said friend, "Molly, what are pel meni?"  Lo and behold!!!  Pel Meni are russian dumplings!!!  SHE MADE THEM FROM SCRATCH!!!!  GAH! 

So Molly (as she described it to me) took on this personal challenge to find a great recipe for recreating the dumplings in our beloved Bellingham because our Campus Ministry Chaplain said something like, "You paid $5 for this plate?  I bet you could make these for $1 a plate!"  So the search began for the perfect recipe. 

Now dear readers, I pass the russian dumpling phenomenon on to you.  I'm not russian, I don't know anything about russian food, but these things are addicting!!!!

I will say though, tonight's pel meni making experience almost ended in pregnant lady food disaster tears.  I did not have such an amazing time making the dough for these dumplings.  I thought it would go faster if I made them in the food processor.  It probably would have, if I had added the water slowly, instead of adding the amount of water called for in the recipe as though that amount were set in stone.  To make matters worse, I was making a double recipe so that I could have some to freeze for an "I don't want to cook" sort of day.  UGH!!!  Just imagine a soupy mess!

This was also my first attempt at using the pasta roller I received for Christmas, which apparently doesn't have the most accurate dial settings!  Otherwise it works great!  Thanks Aimee!

But once I figured out the pasta roller, added another 2 cups of flour, and kneaded that chunk of dough until my arms hurt, we were in business. 

So a few tips on the dough.  Don't add all the water at once!!!  Add the water little by little until you get a dough that just comes together and isn't sticky.  If it gets too sticky and doesn't roll out properly add more flour little by little.  It should come together well in the food processor, just be careful about the water!!  I can't stress it enough.  When Clare saw the dough in a bowl after it had been made she asked, "Mama what's that sauce?"  That will give you an idea of how horribly wet it was to start out when I added the full amount of water.

See how sticky it looks?  Not good!
Other than that, happy dumpling making!  It goes much faster when you have someone helping!  Jon got really into it by the time we finished.


Pel'Meni Russian Dumplings
Adapted from HERE

Ingredients
dough
1 1/2 cups flour + extra for rolling and consistency
2 eggs
1/4c water (start slowly!!!!  Just watch the consistency of your dough! The original recipe said 1/2c!)
1/2 tsp salt

filling
1/2 lb  ground beef
1/2 lb  ground pork 
2 red onions minced
2 cloves of garlic minced
salt and pepper to taste

topping (sort of like the Bellingham place's toppings)
2tsp Sriracha sauce
2tbsp red wine vinegar
generous sprinkling of curry powder
sprinkling of cilantro
serve with sour cream!


Method:
1.  In a food processor combine flour and salt.  Add eggs one at a time pulsing to combine with flour.  (You can do this by hand on a board, or in an electric mixer with a dough hook as well.)

2.  Add water one tablespoon at a time, pulsing until you get a dough ball that comes together without being too sticky. 

3.  Take out the dough and knead it by hand until it comes together nicely.  Let it rest for 30 minutes.
I had to add about another cup of flour at this point.  It was much too sticky. 

4.  Combine all the filling ingredients and mix well!  
I recommend using your hands for this.  Everything seems to stick together better when you're doing it by hand rather than by spoon.

5.  Roll out your dough in sections with a pasta roller or by hand.  Cut out 2 inch circles.  Alternatively you could pinch off dough balls and roll out each one.  Make sure you put some parchment paper in between layers of dough circles so that they don't stick to each other!  I was not so smart about this.
The bottom layer of dough circles stuck togeher horribly.  They'll get rolled out again tomorrow after the dough scraps have rested more.

6.  Fill half of each piece of dough with a lump of filling (maybe a tablespoon) and fold half over creating a semi circle.  Pinch the edges together and bring the sides together and tuck them under.  They'll look like giant tortelloni.
7.  When you've filled all your dough circles boil the pel meni in salted boiling water for 7-10 minutes until the pel meni are floating to the top. 

Enjoy with all the toppings!!  Don't skimp on the curry powder or sour cream!

I'm going to have to find a recipe for the potato version of these for Fridays in lent.  I expect that the recipe would be something like hungarian perogies. 


In the name of the Father, the Son, and the Holy Spirit, Amen.
Dear Heavenly Father,
  thank you for fun college experiences and great friends.  Help us to continue to support each other in our faith and lives after college.  Amen.

Sunday, November 13, 2011

BBQ Baby Back Pork Ribs

Tonight's dinner was tres easy.  I made the ribs, Jon made the garlic bread and peas and corn.  I love making dinners that don't require me to think too hard and yet seem to satisfying and fool proof.  Ahh...bake and slather with BBQ sauce.  What could be easier?

I think I started mixing my own BBQ sauce in college.  Back then the ingredients included ketchup, brown sugar, soy sauce, garlic powder and pepper.  Not too much has changed.  A few months ago a priest friend of mine who joined us for dinner quite regularly mentioned that his family used molasses in their BBQ sauce, so I gave it a whirl.  Now the BBQ sauce I make has less sodium in it because I stopped using soy sauce and only use molasses.  Did you know that Molasses (at least organic molasses) is a good source of potassium, calcium, and iron?  Cool huh?  So hey, my BBQ sauce has some vitamins in it.  Cool.

There's not much to the prep for these baby back ribs, just lots of sprinkling.  I'll be honest, I don't really know how much of any one powder I used in the process, so you'll just have to be satisfied with a "good sprinkling" as a guideline.


I almost forgot to take a picture!  I was literally about to cut into my hunk of ribs and dropped my utensils when I remembered that I was going to blog about tonight's dinner!  Sorry I didn't get a shot of the whole set of ribs!


BBQ  Baby Back Pork Ribs
(I made this up and looked up temperature and timings in the Better Homes and Gardens checkered book)

Ingredients
For the ribs:
2lbs baby back ribs (please make sure they are completely thawed when you start)
garlic powder
onion powder
salt
pepper

For the sauce:
1/4c ketchup
2tbsp molasses (organic and unsulphured!)
1tbsp honey
2tsp spicy brown mustard or Dijon mustard
1tsp brown sugar
1tbsp garlic powder
2tsp freshly cracked black pepper
salt to taste


Method

1.  Preheat the oven to 350 degrees. 

2.  Give the ribs a good sprinkling of the onion powder, garlic powder, salt, and pepper and rub it in on both sides.

The ribs sprinkled and rubbed with the powders and salt and pepper.  If you like them spicy sprinkle them with cayenne pepper too!

3.  Bake on a rack in a roasting pan in the 350 degree oven for one hour.

4.  While the ribs are baking combine all the sauce ingredients.  Taste it!  If it tastes too much like ketchup, or too sweet add some garlic powder and a bit of salt.  If it's too salty add a bit more honey, brown sugar, or ketchup.  It's really a taste thing with bbq sauce.  If you like a spicy sauce try adding a bit of cayenne pepper or your favorite hot sauce.

5.  After the ribs are done baking for an hour slather them with sauce on both sides and return them to the oven for another 30 minutes.  Serve with the leftover sauce. 


See?  Super easy, very tasty, and a fraction of the cost of going out for baby back ribs.   One of these days I might try making a bbq sauce with some apple cider or some applesauce instead of honey to see what that tastes like.  Any of you have great bbq sauce making tips? 
I'd love to hear them since I'm such an amateur at this.


In the name of the Father, the Son, and the Holy Spirit, Amen.
Dear God,
  I thank you for two healthy children and a healthy pregnancy so far.  Thank you for their little bbq sauce smeared faces.  Please help my husband and I continue to nourish these wonderful little people and to lead them closer to you.  Amen.

Thursday, November 10, 2011

Pork Satay with Peanut Sauce

I'm finally back to the blogging world with something delicious.  I haven't made this dish for a while.  Actually I suppose I've never made this dish the way I did today.  The Satay recipe I found actually uses chicken and I've made it with chicken a few times before, but tonight I thought I'd see what would happen if I used pork.

It was a really good switch.  I might not go back to chicken. 

The ingredients in this aren't too rare.  You may keep these things in your pantry on a regular basis.  The weirdest thing on here may be fish sauce (patis).  Pretty much every Filipino home will have this in the cupboard, but it might be a specialty item for the rest of you.  Have no fear, a bottle lasts a long time.  It's a good investment for many yummy recipes!

The peanut sauce in this recipe I think is especially good.  The sauce yield is pretty large, so you'll have some left over in case you want to repeat this a few days later, or serve it with some rice noodles the next day.  My toddler girl devoured her noodles in peanut sauce.  She kept talking about how much she liked peanut butter while she ate.  I wish I took a video!  Ha ha! 

I think that satay is actually supposed to be skewered and barbecqued meat, but since I don't have a real bbq and I didn't feel like pulling out the electric grill I just baked my meat in the oven.  The flavor was still great, so I'm convinced that it would be even better on a bbq.  If you ever try this recipe out on a grill, let me know how it goes. 

Oh, I also made this peanut sauce without the chile peppers to keep it kid friendly.  If you like it spicy, add them in!


Pork Satay with Homemade Peanut Sauce

Ingredients
For marinade:
1lb pork country ribs cut into 1x2 inch chunks
3 cloves of garlic minced
2tsp ginger root minced
1 1/2 tbsp fish sauce

For sauce:
2tsp oil
1/2c onion minced
3 cloves garlic minced
1tbsp ginger root minced
1/2c peanut butter
1 can coconut milk
2tsp soy sauce
2tsp brown sugar
5tsp fish sauce
1 1/2 tbsp lime juice

Method
1.  Toss the first four ingredients in a bowl until the pork is covered in marinade.  Cover and marinate for at least 1 hour.  I marinated mine for about 3 hours.

2.  Heat the oil in a pot over medium heat and stir in onions, garlic, and ginger (and chiles if you're using them).  Cook until the onions are soft and start to brown.


I don't know why the picture is like this.  You'll notice that my onions are not minced finely.  I should have read the recipe more closely.  I ended up having to puree my sauce after it was done so that there weren't huge chunks of onions in it.  To avoid having to do that you might want to just mince the onion, garlic, and ginger in a food processor in the beginning.

3.  Preheat oven to 400 degrees.

4.  Reduce the heat to low and stir in the peanut butter, coconut milk, soy sauce, brown sugar, fish sauce and lime juice.  You may need to use a whisk to blend everything together well. 

5.  Simmer gently for about 10 minutes and keep warm. 

6.  Bake your pork in the oven for 30 minutes or until no pink is left in the center (or grill on a bbq).  Serve with the warm peanut sauce over rice stick noodles!


In the name of the Father, the Son, and the Holy Spirit, Amen.
Dear Heavenly Father,
  A lot of friends and family are suffering from various illnesses and other concerns at the moment.  Please help comfort everyone during these trying times and help us to always remember that you are always with us through trials.  Help us to offer up our sufferings and pray for those who have no one to pray for them.  Amen. 

Wednesday, October 12, 2011

Mongolian Pork

I think there were flames coming out of my mouth at dinner tonight.  I made Mongolian Pork.  The recipe is actually called Sweet, Spicy, Sticky Chicken and it's from allrecipes.com but I decided to try it with pork tonight.  Aside from chicken, the original recipe also calls for fresh ginger and garlic which is also nice, but tonight I didn't feel like having chunks of ginger and garlic in the sauce so I went with the powders.

I'm calling it Mongolian Pork because I think the sauce tastes a heck of a lot like the "Mongolian" sauce that our favorite Mongolian Grill restaurant uses.  I use the quotations because I have no idea what Mongolian food is actually like and I don't really trust your average Mongolian grill chain restaurant with authentic ethnic food.  Can you blame me?  Does anyone know what real Mongolian food is like?

So if you've never been to a Mongolian Grill and have no idea what the sauce might taste like, I suppose the original name for the dish might be more descriptive, though more cumbersome to say, unless you love alliterations. 

Mongolian Pork (Or Chicken or whatever meat you choose)
adapted from here

Ingredients
  • 1 tbsp brown sugar

  • 2 tbsps honey

  • 1/4 c soy sauce

  • 2 tsp ginger powder

  • 2 tsp garlic powder

  • 2 tbsp sriracha sauce (though I might use 1 tbsp next time so that I don't have to feel pain during dinner)

  • 1/3 c + 1tsp cornstarch

  • salt and pepper to taste

  • 1lb boneless pork pieces cut into cubes

  • 2 tbsp oil


  • Method
    1.  Mix together brown sugar, honey, soy sauce, ginger powder, garlic powder, sriracha sauce (I imagine any hot sauce will do just fine), and 1 tsp cornstarch (use non gmo!).  Set aside.

    2.  Heat the oil in a stainless steel skillet or pot, preferably a large one.  I'd say keep the heat between low and medium.  If you have a good stainless steel skillet you won't need it any hotter.  If your pan is too hot everything will stick and burn.  If you try to use nonstick I don't think your pork will brown and crisp as nicely.

    3.  Dredge the pork in the remaining cornstarch until it's completely white.

    4.  Fry the pork in the oil until all sides are light brown and crispy and the pork is completely done.  If there's a lot of oil left in the pan, drain it out.

    5.  Lower your heat and add the liquid mixture from step 1 to your fried pork.  Mix everything together and let it bubble a bit until the mixture thickens and all the pork is coated. 

    That's it!

    Top with nuts if you like and serve over hot rice or noodles.


    I would imagine that this recipe would work well if you added some sliced veggies in with the pork or if you decided to stir fry everything instead.  I do the cornstarch dredging because I like the crispy texture underneath the sauce.  The texture is sort of like a Chinese sweet and sour pork.  Though I may try doing the stir fry thing in a wok next time because it would be healthier. 

    Try it out!  If you're a fan of spicy Chinese food I think you'll like this.


    In the name of the Father, the Son, and the Holy Spirit, Amen.
    Dear God,
      thank you for a healthy 14 week old baby in utero.  Please keep him or her safe until it's time to come out and please protect all the babies in their mother's wombs all throughout the world.  Please bless the efforts of everyone participating in 40 days for life.  Amen.

    Tuesday, September 27, 2011

    Chicken Adobo (Filipino Adobo, not Mexican)

    I think this is the easiest thing in my repertoire.  It's pretty much foolproof and Jon loves it which makes it a pretty common dish around here. 

    Adobo always reminds me of being at home because we had it growing up a lot too.  Even now that I am all grown up and married to a white guy, I still have to eat it with a spoon and fork (the Filipino way!).  It feels weird to eat it with just a fork. 

    In case you aren't familiar with the spoon and fork method, let me instruct you.  Your fork goes in your left hand (this is for right handed people, reverse if you're a south paw) and spoon goes in your right hand.  Gather up some adobo and rice into a nice little pile with your spoon on your plate, then push the little pile into your spoon with your fork and eat it out of the spoon!  See?  Now isn't that efficient?  Jon still refuses to try, even though I'm convinced he realises the sheer convenience and efficiency of the method. 

    I think there's also some rule that you have to have equal portions of meat to rice on your spoon.  My parents would always look at me like I was adopted if I was just eating meat without rice on there.  My dad would just keep saying, "Don't you want more rice?  Here!  You don't have any more rice!"  It was like a dinner tragedy if one's plate was void of rice yet still had meat on it.  Ha ha!  Oh eating at home.  It's still like that.  Yeah, those of you who have eaten with my parents (esp. my dad) know what I"m talking about.

    If you ever want to witness the quirkiness of my family's eating habits, I'll invite you to the next family bbq.  Just shoot me a comment! 

    Back to the recipe. 

    There are 2 schools of thought that I know of when it comes to adobo.  One being my mom's and the other being my sister's.  (As you can tell, I'm not so well read on the traditional adobo history or whatever).  Mom says no water, sister says as much water as soy sauce and vinegar.  Being the experimenter that I am, when I broke off on my own I used the in between rule:  half as much water as soy sauce and vinegar.  It seemed to work well for me.  Tonight I tried it my sister's way and Jon told me he prefers it stronger the way I usually make it.  I think I like it fine either way.  You can experiment on your own.  Here's the recipe the way I usually make it.


    Adobo
    (adapted from mom and sister...probably Lola's recipe)

    Ingredients
    2lbs chicken thighs or legs (this also works really well with pork ribs!!)
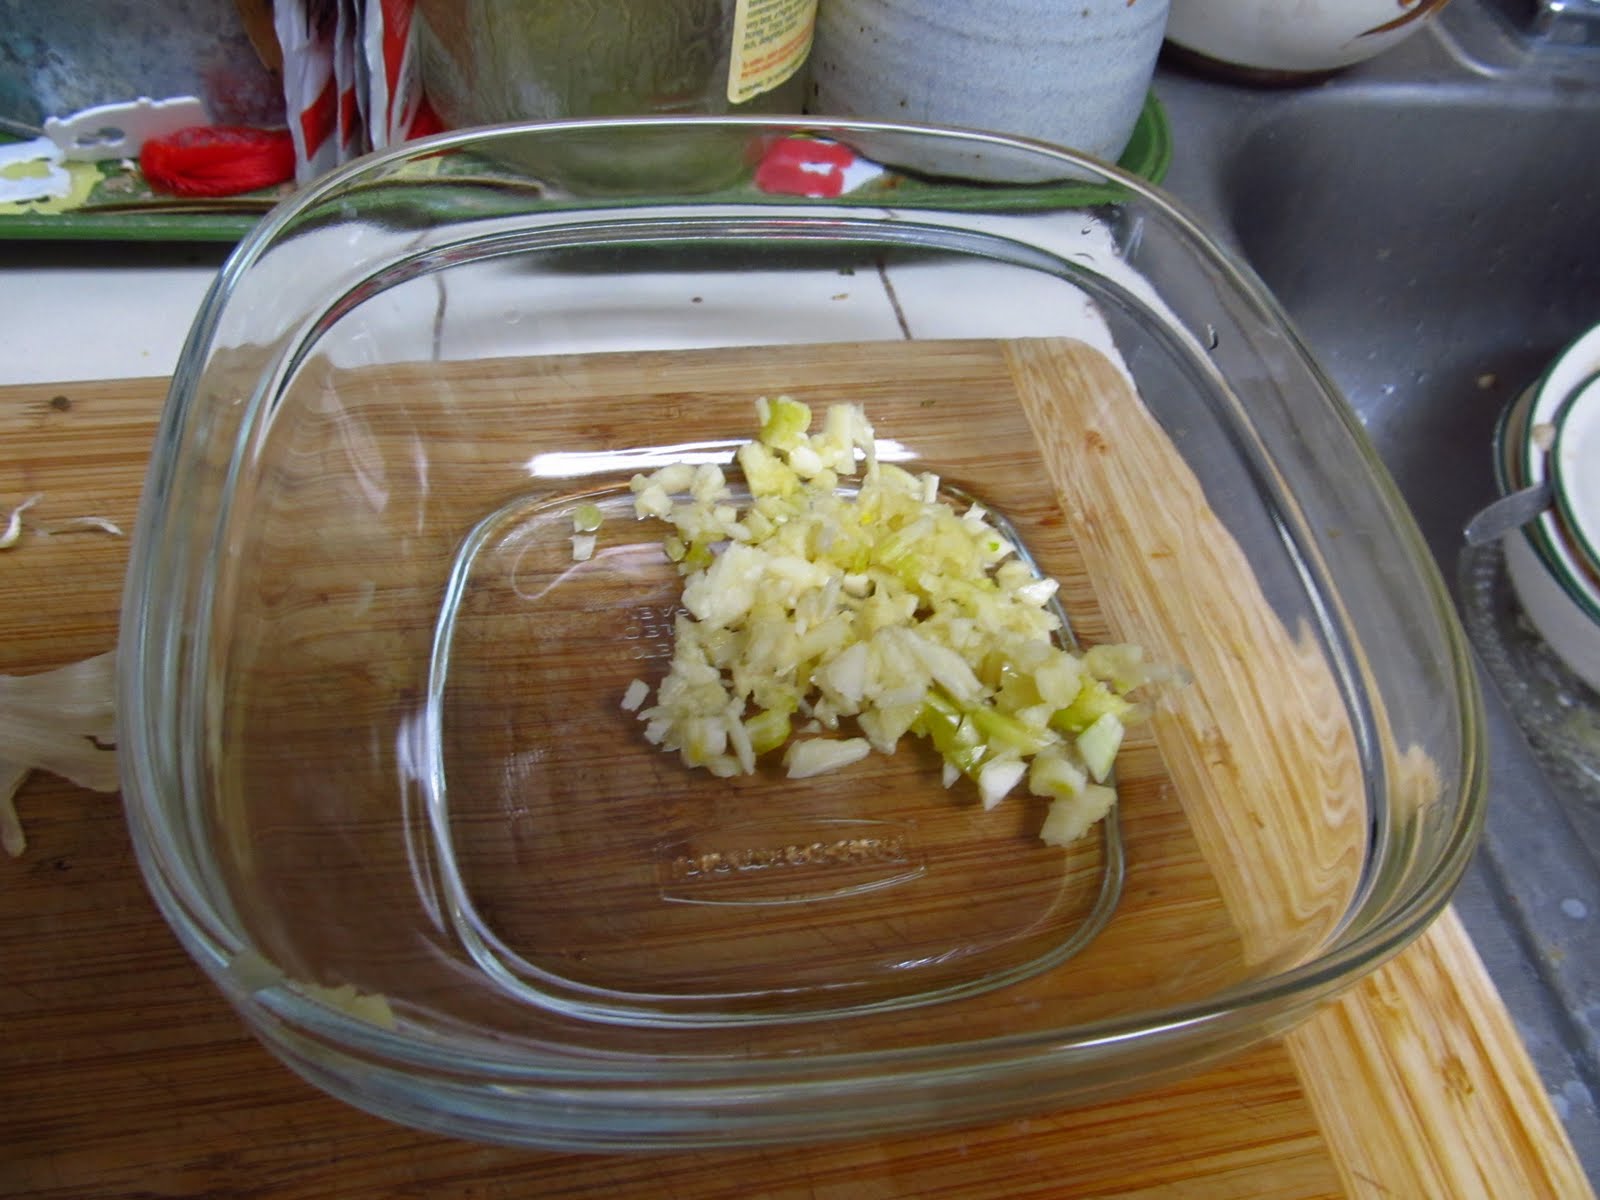
    4 cloves of garlic minced
    1/3 cup vinegar
    1/3 cup soy sauce
    2 1/2 tablespoons of water
    1 tsp fresh ground black pepper
    1 bay leaf


    Method
    1.  Place all ingredients into a pot and do not stir!!  Lola(grandma) says if you stir it then your adobo will be sour!  Make sure your pot isn't too big.  The liquid around your chicken should rise to at least halfway up the chicken.

    2.  Heat up to boiling.  Once it has boiled Lola allows you to stir it.

    3.  Cover and reduce heat to simmering.  Let it simmer at least 30 minutes or up to an hour.  The longer you let it simmer, the more flavor it has.  Just watch out, if you let it go too long it'll look like pulled pork.

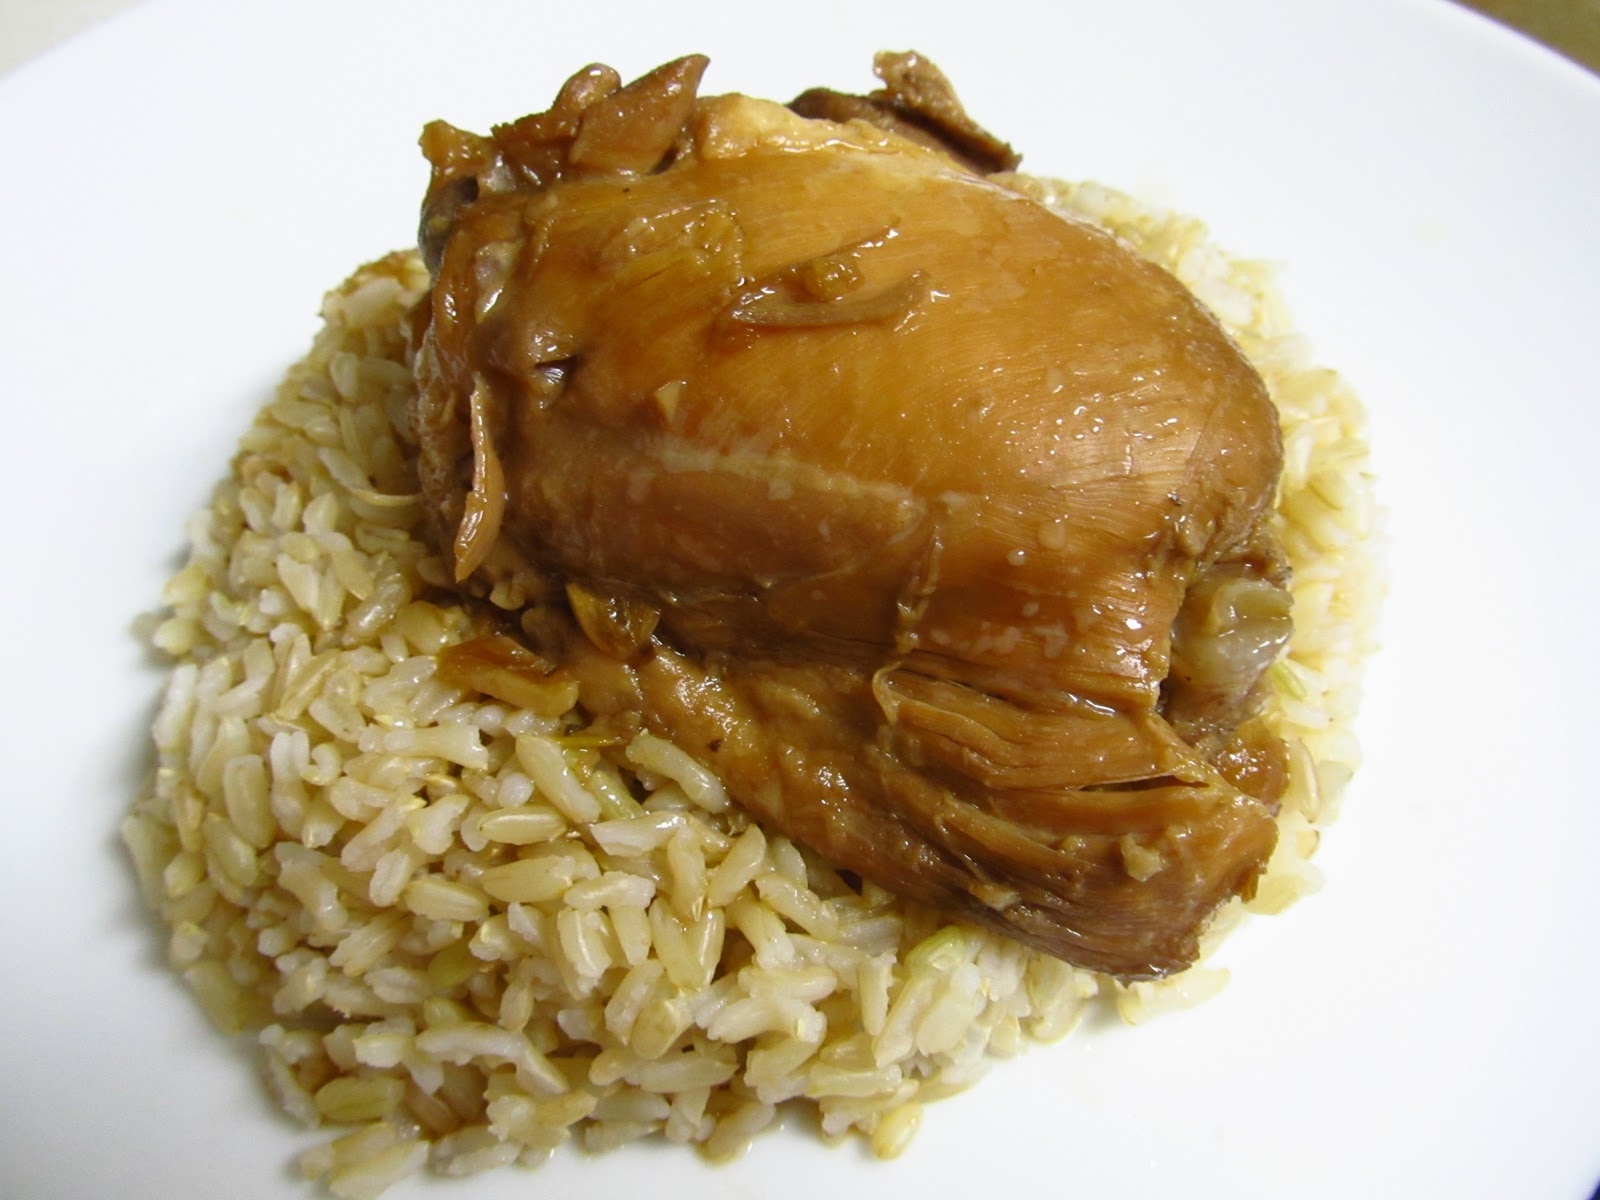
    4.  Serve over hot rice!  Don't forget the sauce!  That goes all over the rice!

    Yes friends, it's that easy.  Not too many pictures tonight because, as you can see, the method is not all that complicated.  I think there are lots of variations on adobo in the Philippines, but this is how my family does it.  In some places they use coconut vinegar, in others they don't use soy sauce, in yet others chiles are added.  As far as I know, the adobo that we make is pretty standard.  I think it's the national dish of the Philippines or something right?  Super common.  Try it out!  I hope you like it!

    In the name of the Father, the Son, and the Holy Spirit, Amen.
    Dear God,
      thank you for little comforts that remind me of my childhood and home.  Whenever I start to get that nostalgia for home, help me to remember that my ultimate home is in heaven and help me strive to get to you always.  Amen.

    Saturday, September 24, 2011

    Meatloaf

    Last night was a pretty easy meal and I got the recipe here.  I used grated potatoes, not frozen hashbrowns.  It wasn't the most exciting thing in the world, but it's cheap and quick!  I guess I just don't get that excited about too many fish recipes, which is why I didn't blog last night.  I"ll have to get more adventurous on Fridays.

    Tonight we had good old meatloaf!  I don't know if I've ever had meatloaf anywhere but my mom's house, so I don't know if this is how everyone makes it, or if it's some Filipino version of meatloaf.  Maybe someone can comment at the end of the post and let me know if it's the weirdest recipe they've ever seen, or it's pretty standard.  It comes from a book by Nora V. Daza who I guess was like the Rachel Ray of the Philippines back when my mom was learning how to cook.

    Meatloaf is a funny sort of dish.  I think it's characteristically American right?  I don't remember hearing a lot about meatloaf or ever seeing it on a menu when I lived in Vancouver (Canada), but I don't think I talked about food much with anyone else than my family.  But there seem to be funny feelings surrounding the dish.  I'm not sure exactly what it is.  Maybe it's a love it or hate it sort of dish?  Or maybe a if you get it right then it's really good, but if you get it wrong it's really, really bad?  I don't know.  It's a mystery to me.  But in this house, we love meatloaf.  I like to think I get it really, really right.  Here's the recipe, so you can replicate the meatloaf and prove me wrong if you want.


    Meat loaf de luxe
    adapted from "Let's Cook with Nora" by Nora V. Daza

    (The original recipe uses something called Liberty milk.  I have no idea what that is, but I used regular milk.  The original also uses bacon, but my mom usually flavors it with bbq sauce, so that's what I stuck with.)   

    Ingredients
    1c soft bread cut into pieces
    1/2 c onion minced
    1lb ground country sausage
    1lb ground beef
    1 egg beaten
    3/4 milk
    1/3c barbecue sauce (I mix ketchup, molasses, garlic powder, pepper, and dijon mustard.  Sometimes I add hot sauce if we want it spicy!)
    salt and pepper to taste


    Method
    1.  Preheat oven to 350 degrees.  Mix together milk, egg, bread, onion, and salt and pepper.  I use my hands and do a lot of squishing.

    2.  Add ground beef and country sausage and keep squishing until everything is well combined.

    3.  Mix in 3 tbsp of bbq sauce and spread meat mixture into a loaf pan.

    4.  Bake at 350 for 1.5 hours.  Drain off fat.  Serve with the remainder of the bbq sauce.

    Sorry, no pics of the process tonight.  I should have enlisted Jon's help to take photos because the process involves a lot of squishing and messy hands.  Here's a pic of the finished product though!


    In the name of the Father, the Son, and the Holy Spirit.  Amen.
    Dear God,

    thank you for family recipes and the stories that go along with them.  Help us to be thankful for the spiritual nourishment you give us in the Eucharist every time we sit down at our own family table for a hearty meal.  Amen.

    Wednesday, September 14, 2011

    Bicol Express (I think it's like the Filipino version of Green Curry)

    So you may or may not have noticed that I didn't blog yesterday.  That's pretty much because we had BBQ chicken sandwiches.  Kinda like pulled pork, except pulled chicken.  Not the most exciting thing in the world to me.  But if the idea of BBQ chicken in a bun makes your mouth water, let me know in the comments and I"ll give you a recipe for BBQ sauce so you can make your own! 

    Tonight's recipe is a bit more exciting!  Bicol Express! 


    Doesn't that look good?

    I think it's the Filipino version of a Thai green curry.  At least that's what I tell friends who are like "Bico what?" 

    Two years ago, my mom started to make this dish all of a sudden.  It was a bit strange, because while I was growing up my mom made so many different filipino dishes I just figured that she'd used up her whole filipino repertoire on us already.  Then all of a sudden here comes some curry like dish that I'd never seen before that is AMAZING!  What the heck?  It's like she was holding out on us or something.  Where did that come from anyways ma?

    Well anywhoo, apparently this dish is from an area called Bicol and it's one of their signature dishes.  Maybe my friend Jo can comment and tell you more about it because she's from there.  I unfortunately do not have a plethora of knowledge about the Philippines.  I'm what they call....a coconut.  Brown on the outside and white on the inside.  Sort of.....maybe I'm a light tan color on the inside.  In any case, this dish is amazing and it's really easy to make.  It will make your whole house smell exotic and delicious!!

    Here's what you need to get started.

    Bicol Express
    (one of those nebulous recipes that comes out of my mom's head.)
    4-5 cloves of garlic minced
    half a large onion diced
    thumb sized chunk of ginger minced
    1tbsp oil
    1lb pork cut into chunks (I used pork shoulder again)
    2-3 tbsp of shrimp paste/ bagoong /sauteed shrimp paste (I'll show you a picture)
    1 can of coconut milk
    1tsp turmeric
    1 jalapeno diced
    2 serrano chiles diced
    2 anaheim chiles/peppers cut into chunks

    (completely optional and not traditional, 2 handfuls of green beans)

    
    Just so you know, I didn't use all that garlic.  After I peeled it off, I realized that I had double what I needed. 
    

    1.  Saute your garlic, onion and ginger in the oil until soft.
    2.  Add your pork and saute until just browned on the outside.
    3.  Put in 2tbsp shrimp paste (add more to taste, sometimes this can get really salty) and stir until it coats everything.
    So for all you filipinos wondering......  Yes it's supposed to be bagoong, but I can't find any bagoong here that isn't loaded with MSG.  So I had to wander off to the Thai section of the grocery and luckily I found this stuff that is just bagoong paste.  The color is a bit lighter, but the taste is right on.  Good thing too, or no Bicol Express for me!


    4.  Add the coconut milk and turmeric and bring to a boil.


    5.  Once it boils add all your chiles and turn the temp down to low and let it simmer for at least 30 minutes.  Preferably an hour so that the pork is fork tender (that means you can mash it with a fork). 
    That's it!  Yum.  If you want to give your veggies for the night some flavor I highly suggest throwing in a few handfuls of green beans so that they're coated in the curry sauce.  The consistency of the green beans is great with the chiles.  Serve it over hot rice! 


    Oh and for those of your worried about spice, it's not crazy spicy.  If you want it spicier add more chiles, and if you like it less just use the anaheim peppers with a tiny bit of jalapeno.  I'd say that mine is probably 2 out of 5 stars.  It's got just a bit of heat in the finish.


    In the name of the Father, the Son, and the Holy Spirit, Amen.
    Dear Heavenly Father, thank you for our joyful day and our satisfying dinner.  When we eat spicy and salty dishes like this help us to remember that "We are the salt of the earth."  Amen.


    Wednesday, September 7, 2011

    Inihaw na Baboy with Sinangag or Filipino BBQ pork with garlic fried rice depending on your ethnic sensibilities

    It finally feels like summer around here, and while for the average American/Canadian summer means hot dogs and hamburgers on the BBQ, for filipinos a hot BBQ usually means Inihaw na baboy!
    Ini what?  BBQ pork for all my non filipino friends. 

    If you've been to one of our family barbeque's you've most likely had Inihaw.  It's the awesome tasting pork stuff my dad was tenderly caring for on the grill. 

    Tonight I feel like I finally aced the Inihaw.  My dad is the king of Steak and Inihaw.  I think this is pretty close to his recipe, but I'd be hard pressed to get any real measurements out of him.  He'd probably just say, "enough liquid to go halfway up the meat in whatever container you're using," or something like that.

    The last time I had Inihaw was a few months ago on our camping trip.  Truth be told it's best over a charcoal grill or campfire, but tonight (since we live in an apartment and don't have a real BBQ) we had to make due with our Cuisinart electric grill. 

    I think traditionally Inihaw na baboy is made with pork belly, but today I used pork shoulder because that's what was available at my local butcher shop.  The shoulder seemed to work very well!

    If you're craving some good ol' filipino BBQ to slap on your grill, then by all means, keep reading.


    Inihaw na Baboy (Filipino BBQ Pork)
    Pronounced "ee-knee-how nah bah boy"
    Dad's recipe........I think.

    1lb of pork shoulder
    4-5 large cloves of garlic minced
    1/3 c white vinegar
    1tbsp lemon juice
    1/4c soy sauce


    1.  I sliced my pork into four strips and put them into a glass container with the minced garlic, lemon juice, and white vinegar. I think the size of the pork is your preference.  Set aside the pork for 4 hours or up to a day.  I marinated mine for about 5 hours.

    2.  About an hour before you intend to cook your meat bring it out of the fridge, mix in the soy sauce and allow it to come up to room temp.  Some of you may be freaking out, but this will ensure even cooking and the reduction of heat shock to your meat which makes it tough.  You're going to cook it properly right?  Don't worry.


    3.  Heat up your grill/bbq!  I set the electric grill on high.

    4.  Lay your meat on the hot grill and grill for 5-7 minutes on each side depending on the thickness of your pork.  Don't move it around, just let it sit so that it gets nice grill marks!  Just cook it until it's done.  If you have a grill press that would probably help cook the larger chunks more evenly, so feel free to make use of that.


    The Inihaw goes perfectly with sinangag.  They're best buds.

    My dad used to make Sinangag all the time when I was a kid.  He usually made it in the wok, and yes I have a wok, but honestly I was just too lazy to get another pan out of the labyrinth that is the pot and pan cupboard, so I used the cast iron skillet which is a fixture atop our stove. 

    Some people really like letting a crust of rice form on the bottom of the pan that they can peel off later and eat like a chip.  My lolo (grandpa) used to love that and I do too, but the rice chip thing works better in a wok, so no rice chips for me tonight.

    This rice is really versatile and is eaten with just about anything in the Philippines, so don't hesitate to make it whenever you feel a need for delicious, peppery, garlicky, rice. 


    Sinangag (Filipino garlic fried rice)
    pronounced as written.  "Sin-ang-ag"! 

    4 or 5 cloves of garlic minced ( I tend to overload on garlic, so if you like less, you can scale it down)
    2 tbsp sunflower oil (or other oil that can stand higher heat)
    2 cups cooked rice (we use brown, preferably cooked the day before)
    1/2 tsp dill
    salt and pepper to taste
    1.  Saute your garlic in oil on medium until tender.

    2.  Add all the rice and mix well so you don't burn the garlic.

    3.  Turn up the heat to medium high and season with salt and pepper and dill.

    4.  Cook for another 5 minutes until all the rice is warm and the dill, salt, and pepper are well incorporated into the rice.

    Serve hot with Inihaw!  Or anything else meaty and Filipino.


    In the name of the Father, and of the Son, and of the Holy Spirit, Amen.
    Thank you God for good memories of eating with family and friends and this food which nourished us tonight.  Please help Mikey learn to eat meat.  Amen.

    UIOGD.


    ****Oh and for those of you wondering, yes we do eat vegetables.  Last night we had green beans and today we had salads.  I suppose I just don't find those interesting enough to blog about.  I'll have to find some more exciting veggie recipes.