Showing posts with label chicken. Show all posts

Friday, April 20, 2012

Baked Chicken and Spinach Flautas or Taquitos

I'm not quite sure if there is a difference between a flauta and a taquito.  I have a sneaking suspicion that it may have something to do with the tortilla.  Anyone know? 

I suppose it doesn't really matter.  What I made last night was amazing for a few reasons.  1.  It was SO GOOD.  2.  It was baked and not deep fried!  3.  As always it was made completely from scratch and organic!!!  4.  It was relatively healthy!

Flautas are my "go to" dish at Mexican restaurants.  It's my default dish to compare Mexican Restaurants.  Just like "Pad See Ew" is my default dish at Thai Restaurants.  I know, I'm weird.  Whatever.  I never really imagined that I would ever make flautas at home because they're deep fried.  I don't really like doing the deep frying thing at home because I don't have a deep fryer, for some reason I hate filling pots with oil, and I really don't like getting spattered with oil which inevitably happens to me the 1 or 2 times a year I decide to roll up my sleeves and deep fry something (usually lumpia). 


Sorry I didn't get a fantastic plating picture, but trust me.  They were delicious!!!

When I saw this recipe that my friend Erin posted on Pinterest I thought it was too good to be true!  What's more, it looked really simple!  So I tried it out last night.  I thought it might actually have a chance to come out crispy because my homemade tortillas actually use a considerable amount of coconut oil.  By the way, coconut oil makes for fantastic tortillas!!  I've tried making them with butter, but the coconut oil seems to help them hold together better.  I'm not really the lard using type even though I know if you can get your hands on grass fed organic lard it probably won't kill you as quickly as everyone else thinks. :)

Anyways, I think I baked mine for slightly too long as the ends of a few of the flautas got a bit singed.  Just be sure to check yours periodically.  I also didn't flip mine over, because when I did I found that the flipped ones started looking less secure and might have opened up.  They got nice and crispy without flippage anyways.

I didn't really change this recipe, so I don't feel comfortable posting it in it's entirety, but feel free to click over to Healthy Delicious for these amazing Baked Chicken and Spinach Flautas.

What I did differently:
- I used cheddar cheese because I didn't have any Mexican cheese on hand
- I used baby kale because I didn't have baby spinach on hand.
- use my own tortillas (homemade tortilla recipe can be found here) with coconut oil. 
- I didn't simmer the chicken in beer.  I just boiled the chicken and then shredded it.
- I mixed together the cheese, chicken, spinach (kale), and jalapenos after they had all been cooked, for ease of flauta stuffing

Make sure:
- to grease your cookie sheet/sheet pan with some coconut oil before you lay the flautas on there seam side down
- cut your tortillas in half!  I think the fact that there was only 1 layer of tortilla surrounding the filling helped make the crispy tortilla mission successful.

Serve with some fresh guacamole and enjoy!!  Jon poured some store bought tomatillo salsa on his and seemed to like that too. 

In the name of the Father, the Son, and the Holy Spirit.  Amen.
Dear God,
   please help my baby come soon.  If it's your will.  Please.  Thank you!  Amen.

Wednesday, November 16, 2011

Indian Butter Chicken

I think a lot of the time when I love food in a restaurant there's always a desire for me to recreate it at home.  You probably noticed this if you read the slightly failed chile encrusted steak!  Unlike that recipe, this is definitely a success!  Hubby rated this a 5 tonight!  Woohoo!  I've been trying to make some of his favorites this week since it was his birthday yesterday, so I was pretty excited when it got his good reviews.  He really likes Indian food, so that was a great compliment!

I did a few things differently with this tonight than I usually do.  *One change made marinating everything much quicker.  +The second change made the flavor SO much richer.

I really think this rivals any restaurant Butter Chicken.  The sauce tonight was so good that if I was being totally gross I'd probably just eat the sauce like soup.  Hmm...that was probably too much information for you.  HA ha!!  I blame the baby.

Try this!!  You definitely won't regret it.  Though I'll warn you, it might ruin your experience of butter chicken at the next Indian Restaurant you try.  Ha ha! I'm a little too full of myself after eating this it was that good!  This is a pretty special occasion dish around here because it requires a few special ingredients that aren't usually in the kitchen like serrano chiles and heavy cream.  I didn't used to have garam masala or fresh ginger in my kitchen all the time, but I just learned to keep buying those.  This also requires a bit more planning because of the long marinating time.

Makhani Chicken (Indian Butter Chicken)
Adapted from THIS RECIPE on allrecipes.com

For marinating
1 1/2 pounds of meaty chicken pieces cut into chunks(I used cut up thighs tonight)
2tbsp lemon juice
1tbsp chili powder
1/4tsp salt

1 c plain yogurt
4 large cloves of garlic
1/2 tbsp garam masala
1 tbsp chili powder
2inch chunk of ginger sliced
2 tbsp lemon juice
1/4tsp salt

2 tbsp melted butter
Sauce1 tbsp butter
1 tbsp garam masala
1 tbsp ginger minced
1 tbsp garlic minced
1 serrano chile minced
1 15oz can tomato sauce
1 tbsp chili powder
salt to taste
1/3 c water
1 tbsp honey
1/2 tsp fenugreek
1 cup heavy cream

1.  Combine the first 4 ingredients in a large container with a lid.  Set it aside and put the lid on while you work on the rest of the marinade.

2.  Combine the next 7 ingredients in a blender (I used my magic bullet) and blend until smooth.  *This was the first change I made.  I used to mince everything and mix it together, but I think this is so much faster and probably gives a better flavor.  Pour the blended marinade and the melted butter over the chicken in your container and mix well.  Cover and refrigerate at least 8 hours (I usually do overnight).

3.  Preheat the oven to 400 degrees. 

4.  Pull the chicken out of the marinade and bake on a tray in the oven for 45 minutes.  Set aside the marinade.

5.  While the chicken is baking heat the butter and garam masala in a heavy bottom pot until it starts to sizzle.  Add the ginger, garlic, and chiles and saute until soft.

6.  Add the tomato sauce, chile powder, salt, water, and the rest of the marinade (+adding the marinade was the second change I made to the recipe).  Bring to a boil on medium high for at least 5 minutes (this is important to kill off the bacteria!) stirring constantly.  Cover and bring the temperature to low and simmer for 30 minutes stirring occasionally.  Add a little more water if your sauce starts to get too thick. 

7.  Add the honey and fenugreek and take off the heat.


 8.  Add the chicken and heavy cream.  
What my chicken pieces looked like when they came out of the oven.
 
Adding in the cream.

9.  Serve with hot naan or over rice!


It sounds like a lot of work at first, but you'll get the hang of it.  It's definitely worth the work!!  I don't really know where I'd find organic butter chicken in a restaurant either!


In the name of the Father, the Son, and the Holy Spirit, Amen.
Dear God,
  we know that you provide everything for us and are always helping us toward holiness.  Please let us be content with what you have given us while always striving to do your will.  Amen.

Tuesday, November 15, 2011

Yucatan Lime Soup

Today is Jon's birthday!!  I am relatively sure that this is his favorite dish in my repertoire.  The first time we had this soup (well sort of) was on our honeymoon in Mexico almost 4 years ago.  It was our second to last day there and we went on a snorkeling excursion on the island of Cozumel.  After snorkeling, our excursion included lunch.  We headed over to a quaint traditional looking Mexican restaurant (I wish I remembered the name of it) and this soup was the starter.  Well it was something like this soup.  They served it with garlic bread and it paired so well.  The flavor of the garlic bread being flooded with lime soup was fantastic.  Mmmmm.


  When we got home, I was determined to try to replicate the soup because we liked it so much.  I spent a lot of time searching on the internet for the right recipe, and this seemed like it would come the closest and taste the best.  We were also honeymooning on the Yucatan Peninsula, so with the name I thought it would be a safe bet.  At least the region was right! 

Unfortunately I really can't remember what the original tasted like anymore, but this is so good.  I think it comes pretty close.  I was a little hesitant because I didn't think a food network recipe would be authentic, but it seems like it could be.  Maybe my Mexican friends can tell me if they try it.

I'm just going to post the recipe from the website.


I didn't make any real changes to it.  Well, okay I made a few changes.  Okay, well I made 7 changes.  But they're really small changes! 

1.  I used chicken thighs, not breasts because organic chicken breasts are ridiculously expensive and I didn't want to cut up a whole chicken today.  I also let the bones simmer with everything because bones in broth are supposed to be good for you.

2.  I let everything simmer for an hour before adding the lime right before serving.  That way the lime taste is still bright and fresh.  I used the juice of 1 1/2 limes.

3.  I didn't want to buy an avocado because organic avocados are really expensive.

4.  I fried the tortilla separately while the soup was simmering.

5.  I don't ever use vegetable (soybean) oil.  I used organic canola oil to fry the tortillas.

6.  I used 4 cloves of garlic, I think I have a garlic problem. 

7.  I added another dash of cumin when the chicken was sauteeing.

Don't substitue the fresh fried tortilla for bagged tortilla chips.  The freshly fried tortilla chips make such a huge difference!

Saute the onions and cajun seasoning (Emeril's essence).

Add chicken, garlic, chiles, and tomatoes.
Saute everything for a few minutes.

Add the chicken broth!
Oh and tonight I found that if you use homemade chicken broth it tastes SOOOOO much better.  I had previously store bought boxed chicken broth and it just doesn't compare.


Add the lime juice, garnish with tortilla strips, cilantro and a slice of lime!  Yum!

Tonight's attempt was the best I've ever done so far.  I think it was the broth!  Jon said, "Wow that's really good" three times during dinner!!  Woohoo!  That spells birthday dinner success in my books.


Try it out and let me know what you think!  I love reading comments!!

Birthday man also got a mini cherry pie for dessert, but I'm not sure if I'm allowed to post that recipe.  It's his mom's.  I'll have to ask!


In the name of the Father, the Son, and the Holy Spirit, Amen.
Dear Heavenly Father, 
  thank you so much for my amazing husband!  Please continue to bless him with health and holiness and help him to continue to be a wonderful husband to me and father to Clare and Mikey.  Amen.

Sunday, October 23, 2011

Red Sauced Chicken Enchiladas

On thursday night when I made the Pad Thai I used up the rest of my roasted chicken from a few days earlier and made chicken stock.  I also threw in another carcass from separating some chicken pieces for the chicken breasts I used in the Pad Thai.  After the stock was ready I was left with quite a large amount of chicken meat.  So I thought tonight I'd make enchiladas.


I usually make white sauced enchiladas with green chiles, sour cream, and monterrey jack cheese, but recently Jon has been talking about how much fun it'd be to learn how to make red enchiladas.  Hint hint....  That means, "Hey wife would you mind looking up a recipe for red enchilada sauce and learning how to make it so I can eat red enchiladas without paying $11 for it?"  Ha ha!  At least I think that's what he means when he says this. 

I had looked through a few recipes before and I thought I had tried making some sort of red Mexican sauce a while ago with dried chiles (which were hiding in a ziplock bag in the back of our pantry/cupboard), so I figured I could just pick up a few ingredients that were pretty common to Mexican food while we were at the grocery after Mass this morning and whip them up for dinner.

After looking through my mexican cookbook, another sheet full of enchilada recipes my mom gave me, and allrecipes.com I found a recipe called, "The Best Red Enchilada Sauce".  I also happened to have most of the ingredients needed and it got great reviews.  So I thought I'd try using the enchilada sauce in the link with the method for making the other type of white cream based enchiladas...sort of.  I didn't dip the tortillas in the red sauce like I do with the creamy casserole type enchiladas.

I honestly didn't know if this was going to work out so well.  I taste tested the sauce before I simmered it and it didn't taste like much besides tomato paste, so I got a little worried.  Usually when I get really worried about trying something new I don't take a lot of pictures because I don't really want to blog about a kitchen fail.  However....after the sauce simmered, the enchiladas were baked, and Jon took his first bite he said, "Wow that's really good."  He took a few more bites and said again (without prompting by me!), "Wow, that's really good."  I usually have to prod my husband with my fork before he says anything about the food, so this was pretty exciting.  I thought they were decent too, so I prodded, "What would you rate this out of 5?"

He replied, "4.9-5 but only because I think it could still be really perfected."  4.9!!!  4.9!!!??!  That's like a gold medal for an ice skater...wait do they go off a scale of 10?  Whatever!  I was pretty darned excited he liked this that much.  But I agree, it could be even better.  I might even try this with shredded beef sometime, I bet that would be fantastic.

One thing I didn't have was beef broth (yeah, yeah, as usual) for the sauce.  I'm sure that would have made the sauce 10 times better.  I used the chicken broth I made when I cooked all that chicken.  I also scaled down the recipe a bit, so the measurements were probably a tad off.  The original recipe said it made 17 servings.  Since I'm not feeding my extended family I decided to scale it down to 4.  (I know, there are only 2 adults in our household, but Clare eats pretty well, I had a lot of shredded chicken, and we like leftovers here!)

So just be warned.  Try to be very careful with your measurements and use beef broth!

Here's what I did.


Red Sauced Chicken Enchiladas

Ingredients
1lb cooked shredded chicken
6 flour tortillas (I made mine again the recipe is here and I used coconut oil)
1/2 an onion chopped
1/2 tsp cumin
1/2 tsp oregano
salt and pepper to taste
1/2c shredded cheese (tonight I used white and regular cheddar, you could probably also use monterrey jack or cotija)

4 servings of Best Enchilada Red Sauce


Method
1.  Saute onions in a medium pot on low heat until soft. 

2.  Add shredded chicken, cumin, oregano, salt and pepper and 1/3 of the enchilada red sauce and continue to saute on medium until everything is well combined and heated through.  Take off the heat.

3.  Preheat oven to 350.

4.  In each tortilla put some chicken and a sprinkling of your shredded cheese and roll up (don't use up all the cheese).  Put all your rolled up enchiladas in a casserole dish and cover with the rest of the red sauce.  Sprinkle with the remainder of the cheese. 

5.  Bake in the 350 degree oven for about 20 minutes until the sauce is nice and bubbly and the cheese is melted.


Yum!  Serve with a side of homemade (I'll have to post that recipe another time) guacamole!

Again, I have no idea if this is an authentic Mexican recipe, because I am not Mexican, so if my Mexican friends (or those married to Mexicans and living in Mexico) want to correct some inauthenticity here, please feel free to leave a comment! 


In the name of the Father, the Son, and the Holy Spirit, Amen.
Dear God,
  thank you for successful and surprising discoveries.  Help us to never be bored with life so that we always have a child like sense of awe and excitement, especially for your wonders.  Help us cultivate a virtuous Fear of the Lord, which helps us to understand our own place, your love and mercy, and your majesty all at the same time.  Amen.

Thursday, October 20, 2011

Pad Thai

Tonight I decided to try my hand at Pad Thai.  I got the recipe from my aunt.  It turned out....okay.  I think that my tamarind paste may be less than fantastic, because the last time I tried making something using the tamarind paste it was also lack luster. 

Something else that probably also contributed to the "Eh" status of our Pad Thai tonight was that
a)I'm not feeling well and so
b) I didn't have all the right condiments/toppings  - green onions, peanuts, cilantro, bean sprouts
c) I didn't add the chili sauce to the base sauce because I thought I would be serving it to the little ones who love noodles

This may lead you to think, "Now why on earth would you even try making a dish like this when you don't have half the ingredients?"
 Yes, I know.  That's a completely valid argument, however I thought it would turn out alright because most of the time when I see or order Pad Thai at Thai restaurants they don't have most of those things on top of the pad thai, or I don't add them from the little condiment plate. 

NO excuses though, next time I will be prepared!

But you should try this and tell me how it goes.  My aunt loves it and I'm sure if you follow the recipe exactly with all the ingredients you'll have better luck than I did.  All the people who reviewed it on the website gave rave reviews, so I'm sure it's better when you actually follow the recipe properly.  Oh and make sure you get a good tamarind paste.  I might try to actually go to an asian food store for mine next time instead of buying the only one available in the asian section of my grocery store.

Here's the recipe.

Pad Thai just click the title to see it!


Stir frying.


The noodles before being added to the wok.

pretty much done.


It was decent, but it could have been 5 stars instead of 3.5


In the name of the Father, the Son, and the Holy Spirit, Amen.
Dear God,
 please bless our little growing family and teach us all to love you with our whole hearts, minds, and souls and to constatnly seek you throughout the day.  Amen. 

Wednesday, October 12, 2011

Mongolian Pork

I think there were flames coming out of my mouth at dinner tonight.  I made Mongolian Pork.  The recipe is actually called Sweet, Spicy, Sticky Chicken and it's from allrecipes.com but I decided to try it with pork tonight.  Aside from chicken, the original recipe also calls for fresh ginger and garlic which is also nice, but tonight I didn't feel like having chunks of ginger and garlic in the sauce so I went with the powders.

I'm calling it Mongolian Pork because I think the sauce tastes a heck of a lot like the "Mongolian" sauce that our favorite Mongolian Grill restaurant uses.  I use the quotations because I have no idea what Mongolian food is actually like and I don't really trust your average Mongolian grill chain restaurant with authentic ethnic food.  Can you blame me?  Does anyone know what real Mongolian food is like?

So if you've never been to a Mongolian Grill and have no idea what the sauce might taste like, I suppose the original name for the dish might be more descriptive, though more cumbersome to say, unless you love alliterations. 

Mongolian Pork (Or Chicken or whatever meat you choose)
adapted from here

Ingredients
  • 1 tbsp brown sugar

  • 2 tbsps honey

  • 1/4 c soy sauce

  • 2 tsp ginger powder

  • 2 tsp garlic powder

  • 2 tbsp sriracha sauce (though I might use 1 tbsp next time so that I don't have to feel pain during dinner)

  • 1/3 c + 1tsp cornstarch

  • salt and pepper to taste

  • 1lb boneless pork pieces cut into cubes

  • 2 tbsp oil


  • Method
    1.  Mix together brown sugar, honey, soy sauce, ginger powder, garlic powder, sriracha sauce (I imagine any hot sauce will do just fine), and 1 tsp cornstarch (use non gmo!).  Set aside.

    2.  Heat the oil in a stainless steel skillet or pot, preferably a large one.  I'd say keep the heat between low and medium.  If you have a good stainless steel skillet you won't need it any hotter.  If your pan is too hot everything will stick and burn.  If you try to use nonstick I don't think your pork will brown and crisp as nicely.

    3.  Dredge the pork in the remaining cornstarch until it's completely white.

    4.  Fry the pork in the oil until all sides are light brown and crispy and the pork is completely done.  If there's a lot of oil left in the pan, drain it out.

    5.  Lower your heat and add the liquid mixture from step 1 to your fried pork.  Mix everything together and let it bubble a bit until the mixture thickens and all the pork is coated. 

    That's it!

    Top with nuts if you like and serve over hot rice or noodles.


    I would imagine that this recipe would work well if you added some sliced veggies in with the pork or if you decided to stir fry everything instead.  I do the cornstarch dredging because I like the crispy texture underneath the sauce.  The texture is sort of like a Chinese sweet and sour pork.  Though I may try doing the stir fry thing in a wok next time because it would be healthier. 

    Try it out!  If you're a fan of spicy Chinese food I think you'll like this.


    In the name of the Father, the Son, and the Holy Spirit, Amen.
    Dear God,
      thank you for a healthy 14 week old baby in utero.  Please keep him or her safe until it's time to come out and please protect all the babies in their mother's wombs all throughout the world.  Please bless the efforts of everyone participating in 40 days for life.  Amen.

    Wednesday, October 5, 2011

    Chicken Curry

    Since apparently I've given up meal planning for this week I thought tonight's dinner was bound to be a flop.  I was mistaken!  Jon rated tonight's dinner somewhere between 4.5-5.  Cool. 

    Whenever I ask my mom for dinner ideas she usually ends up telling me to go look in one of the cook books that's she's given me.  Last time I talked to her about food she told me that these were the cookbooks she used while we were growing up.  So while I was recently looking in the "Let's Cook with Nora" book by Nora Daza I found a recipe for chicken curry. 

    I was a bit skeptical about this curry.  All of the indian recipes I've made before (butter chicken, vindaloo, tikka masala) require many hours of marinating and this didn't require any, so I didn't think it could taste all that great.  It tastes fantastic!!  What's more is that it doesn't require that many ingredients!!  It's a winner.  I didn't have to think too far ahead and it tastes great. 

    At first I thought I would make this version from allrecipes.  But I went with Nora instead.  The two are very similar anyways.  Here's what I did!

    Chicken Curry
    (adapted from Let's Cook with Nora by Nora V. Daza)

    Ingredients
    1lb of chicken
    1 can of coconut milk
    1 can diced tomatoes
    1/2 an onion diced
    4 cloves of garlic minced
    2 tbsp curry powder
    1tbsp chili powder
    1tbsp oil
    1tsp salt


    1.  Saute garlic and onion in oil. 

    2.  Drop in chicken pieces and cook covered for 5 minutes.

    3.  Add curry powder, chili powder, and salt and stir until well combined.

    4.  Pour in coconut milk and diced tomatoes.  Bring up to a boil.

    5.  Simmer on low for 45 minutes allowing the sauce to reduce until thick and chicken is cooked through. 

    Serve over hot rice!!


    This was easily the easiest Indian style food I've ever made.  It will definitely become a more frequent dish on the weeknight menu.

    In the name of the Father, the Son, and the Holy Spirit, Amen.
    Dear Heavenly Father, 
     thank you for wonderful days with friends and their babies that bring a bit of rest and refreshment throughout the week.  Father, help me prepare for this weekend.   Amen.

    Wednesday, September 28, 2011

    Spanish Chicken and Rice or Arroz con Pollo

    So if you don't know me and you haven't guessed from the blog yet, I'm of Filipino ethnicity.  My parents made the big trip over a few years before I was born, so I guess I'm considered a first generation Filipino.

    Something that my mom never let me forget growing up was that a large part of our heritage is from Spain.  A lot of the food we had growing up was not only Filipino, but had a lot of spanish influences.  I don't think I really understood the big deal about our Spanish heritage until I went to Spain 6 years ago.

    When I spent some time in Salamanca not only did I get very close to the town my ancestors must have come from (it was the same name as my maiden name!), but all the food seemed so familiar!  The flavors and dishes seemed like they were coming right out of my mom's kitchen.  It was so great!  At that point in my travels I had been in Europe for about a month and it was just so comforting to eat something that reminded me of home.  Who knew I could find a little bit of home in a country I'd never been in?

    So anyways, this dish reminded me of that.  It's a bit funny, because my mom has never actually made this, but the first time I tried it, I was reminded a bit of my mom's paella.  She makes it at Christmas and Easter and it's probably my favorite Holiday (Holy Day) food.

    This recipe comes from allrecipes.com and is a great weeknight meal idea. 
    I've taken a few liberties with it like adding chorizo!  My mom puts chorizo in her paella, so when I saw that my local butcher shop makes their own fresh chorizo, I had to try it in this!  I also don't use pimentos, but substitute green peppers and pimentos with red peppers.

    Tonight I had an unfortunate ingredient deficiency.  I didn't have any chicken stock, so I had to use water.  I don't think the dish was too bland though.  It was probably saved by the extra onion, garlic, and chorizo that I threw in there just in case!  When you make it, don't forget the chicken stock!

    Arroz con Pollo
    (adapted from HERE)

    Ingredients
    2lbs chicken thighs
    1 chorizo sausage cut into chunks
    1 onion diced
    3 cloves of garlic minced
    1 red bell pepper diced
    1 cup peas
    1  1/4cup rice
    2 1/2 cups chicken stock
    1tbsp butter
    1tsp turmeric
    1/4 tsp chili pdr
    1/2 cup flour
    1tsp garlic pdr
    salt and pepper to taste


    Method

    1.  Mix together flour, garlic pdr, and some salt and pepper.

    2.  Dredge chicken in flour mixture and brown in melted butter in a large pot or skillet.

    3.  Once the chicken is nicely browned set it aside.

    4.  Saute the garlic, onion, red pepper, and chorizo in the same pan (complete with leftover drippings and brown bits) that you browned the chicken in.  Saute until everything is softened.

    
    I forgot to add the chorizo tonight with the veggies.  I didn't remember until I had added the rice.
    
    5.  Add the rice, turn the temp down and cook for a couple minutes still stirring.

    6.  Add the broth, turmeric, chili powder, and a bit more salt and pepper.  Bring up to a boil. 
    
    I couldn't resist adding a dash of this to the dish.  I don't honestly know what, if anything, it added, I just know it's really popular in spanish cooking.  No it's not in the ingredients.
    
    7.  Pour into a baking dish and top with chicken and peas.
    
    Before I added the chicken and peas.
    

    8. Cover and bake at 350 degrees F for 45 minutes to an hour until most of the liquid has been absorbed by the rice and the chicken is done.
    
    Ready to go into the oven!
    
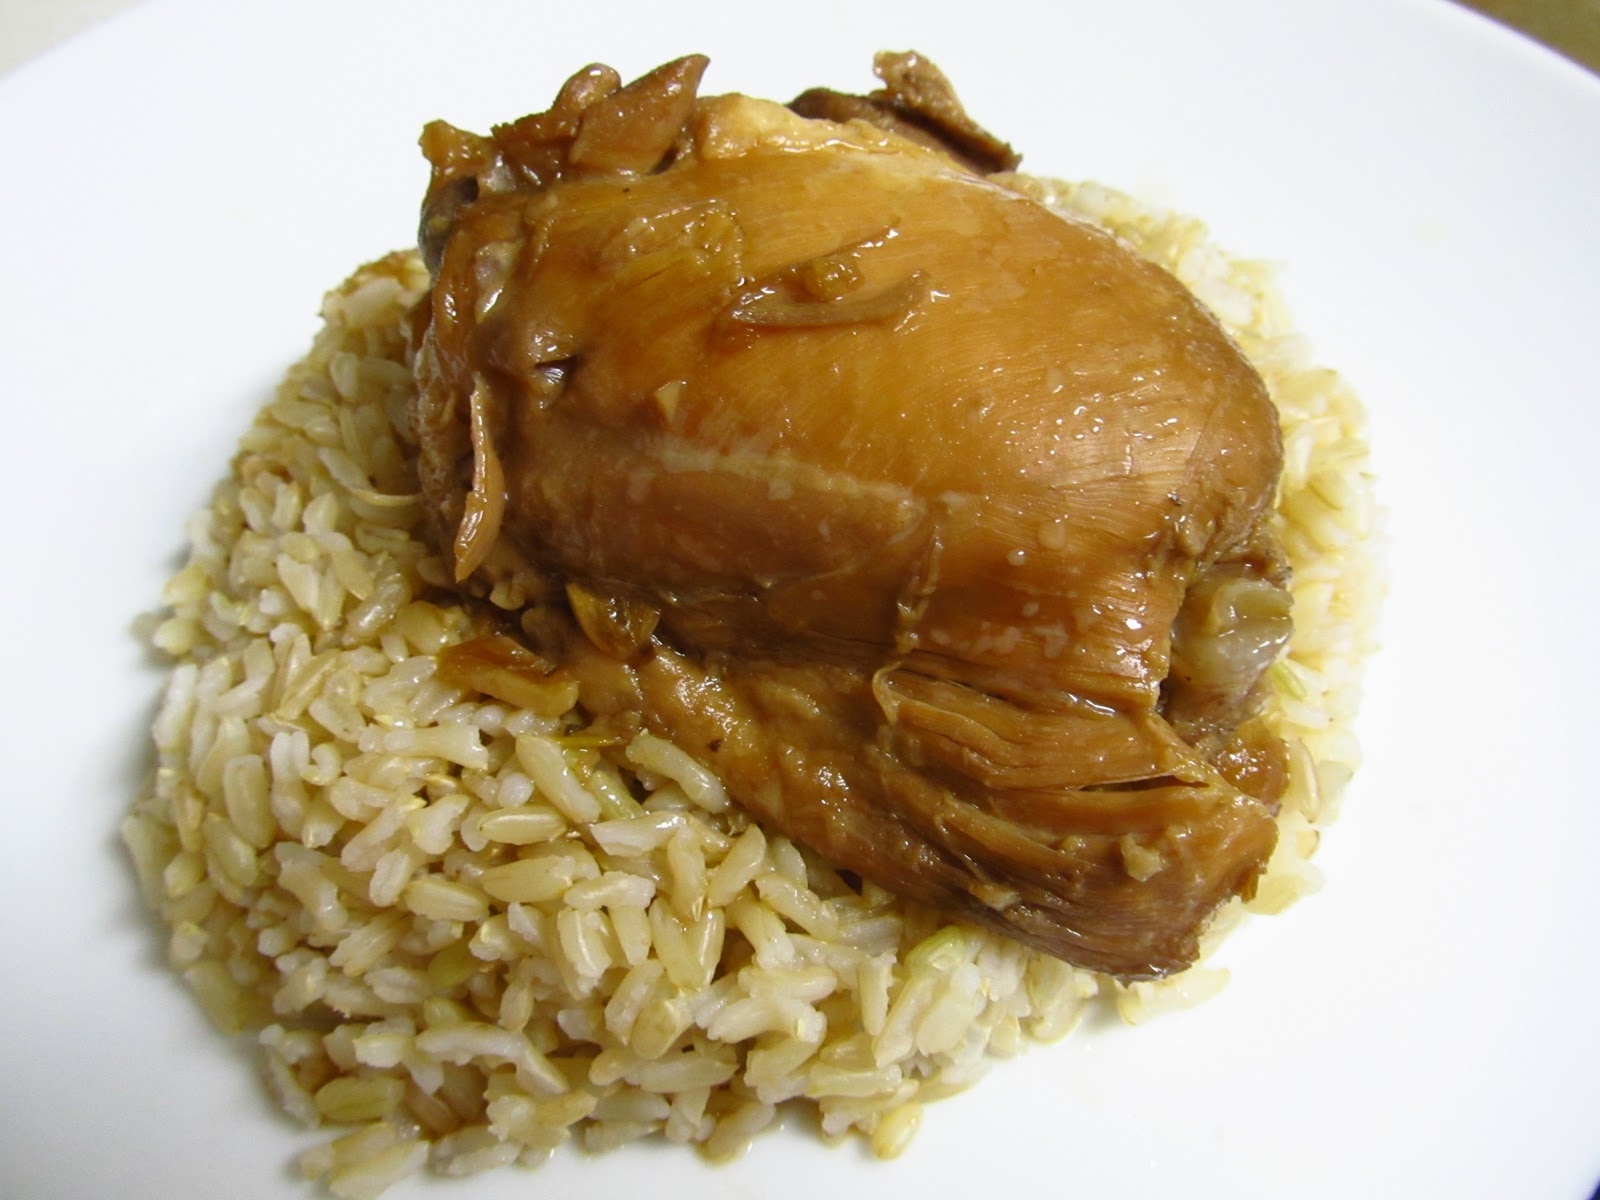
    On my plate and ready to be devoured!  Yum!

    
    In the name of the Father, the Son, and the Holy Spirit.  Amen.
    Dear heavenly Father,
      thank you for every blessing and every trial you send us throughout the day.  Help us to constantly accept the grace you give us to live holy lives full of the fruits of your Spirit.  Amen.

    Tuesday, September 27, 2011

    Chicken Adobo (Filipino Adobo, not Mexican)

    I think this is the easiest thing in my repertoire.  It's pretty much foolproof and Jon loves it which makes it a pretty common dish around here. 

    Adobo always reminds me of being at home because we had it growing up a lot too.  Even now that I am all grown up and married to a white guy, I still have to eat it with a spoon and fork (the Filipino way!).  It feels weird to eat it with just a fork. 

    In case you aren't familiar with the spoon and fork method, let me instruct you.  Your fork goes in your left hand (this is for right handed people, reverse if you're a south paw) and spoon goes in your right hand.  Gather up some adobo and rice into a nice little pile with your spoon on your plate, then push the little pile into your spoon with your fork and eat it out of the spoon!  See?  Now isn't that efficient?  Jon still refuses to try, even though I'm convinced he realises the sheer convenience and efficiency of the method. 

    I think there's also some rule that you have to have equal portions of meat to rice on your spoon.  My parents would always look at me like I was adopted if I was just eating meat without rice on there.  My dad would just keep saying, "Don't you want more rice?  Here!  You don't have any more rice!"  It was like a dinner tragedy if one's plate was void of rice yet still had meat on it.  Ha ha!  Oh eating at home.  It's still like that.  Yeah, those of you who have eaten with my parents (esp. my dad) know what I"m talking about.

    If you ever want to witness the quirkiness of my family's eating habits, I'll invite you to the next family bbq.  Just shoot me a comment! 

    Back to the recipe. 

    There are 2 schools of thought that I know of when it comes to adobo.  One being my mom's and the other being my sister's.  (As you can tell, I'm not so well read on the traditional adobo history or whatever).  Mom says no water, sister says as much water as soy sauce and vinegar.  Being the experimenter that I am, when I broke off on my own I used the in between rule:  half as much water as soy sauce and vinegar.  It seemed to work well for me.  Tonight I tried it my sister's way and Jon told me he prefers it stronger the way I usually make it.  I think I like it fine either way.  You can experiment on your own.  Here's the recipe the way I usually make it.


    Adobo
    (adapted from mom and sister...probably Lola's recipe)

    Ingredients
    2lbs chicken thighs or legs (this also works really well with pork ribs!!)
    4 cloves of garlic minced
    1/3 cup vinegar
    1/3 cup soy sauce
    2 1/2 tablespoons of water
    1 tsp fresh ground black pepper
    1 bay leaf


    Method
    1.  Place all ingredients into a pot and do not stir!!  Lola(grandma) says if you stir it then your adobo will be sour!  Make sure your pot isn't too big.  The liquid around your chicken should rise to at least halfway up the chicken.

    2.  Heat up to boiling.  Once it has boiled Lola allows you to stir it.

    3.  Cover and reduce heat to simmering.  Let it simmer at least 30 minutes or up to an hour.  The longer you let it simmer, the more flavor it has.  Just watch out, if you let it go too long it'll look like pulled pork.

    4.  Serve over hot rice!  Don't forget the sauce!  That goes all over the rice!

    Yes friends, it's that easy.  Not too many pictures tonight because, as you can see, the method is not all that complicated.  I think there are lots of variations on adobo in the Philippines, but this is how my family does it.  In some places they use coconut vinegar, in others they don't use soy sauce, in yet others chiles are added.  As far as I know, the adobo that we make is pretty standard.  I think it's the national dish of the Philippines or something right?  Super common.  Try it out!  I hope you like it!

    In the name of the Father, the Son, and the Holy Spirit, Amen.
    Dear God,
      thank you for little comforts that remind me of my childhood and home.  Whenever I start to get that nostalgia for home, help me to remember that my ultimate home is in heaven and help me strive to get to you always.  Amen.

    Thursday, September 22, 2011

    Wing Night with Sweet Potato Fries

    So my meal planning white board for today said Lamb Tikka Masala.  As you can probably guess from the title of this post, I didn't make Lamb Tikka Masala.  There are two reasons for this:

    1.  I was pretty much a blob on the couch yesterday and didn't get around to thawing the lamb to marinate overnight.
    2.  I realized when I looked at the lamb this morning (thinking maybe, maybe it could work) that it's not really enough lamb for 2 people.  So I'll have to get more lamb for that recipe!

    Tonight I went with one of my easy standards.  Wings. 

    I made regular wings and hot wings.  Jon's a hot wing fan, but the kids don't really like spicy food and I wasn't really up for the spice today.  Actually, making two types of wings doesn't really add very much to the preparation, but you'll see that in the recipe/instructions below. 

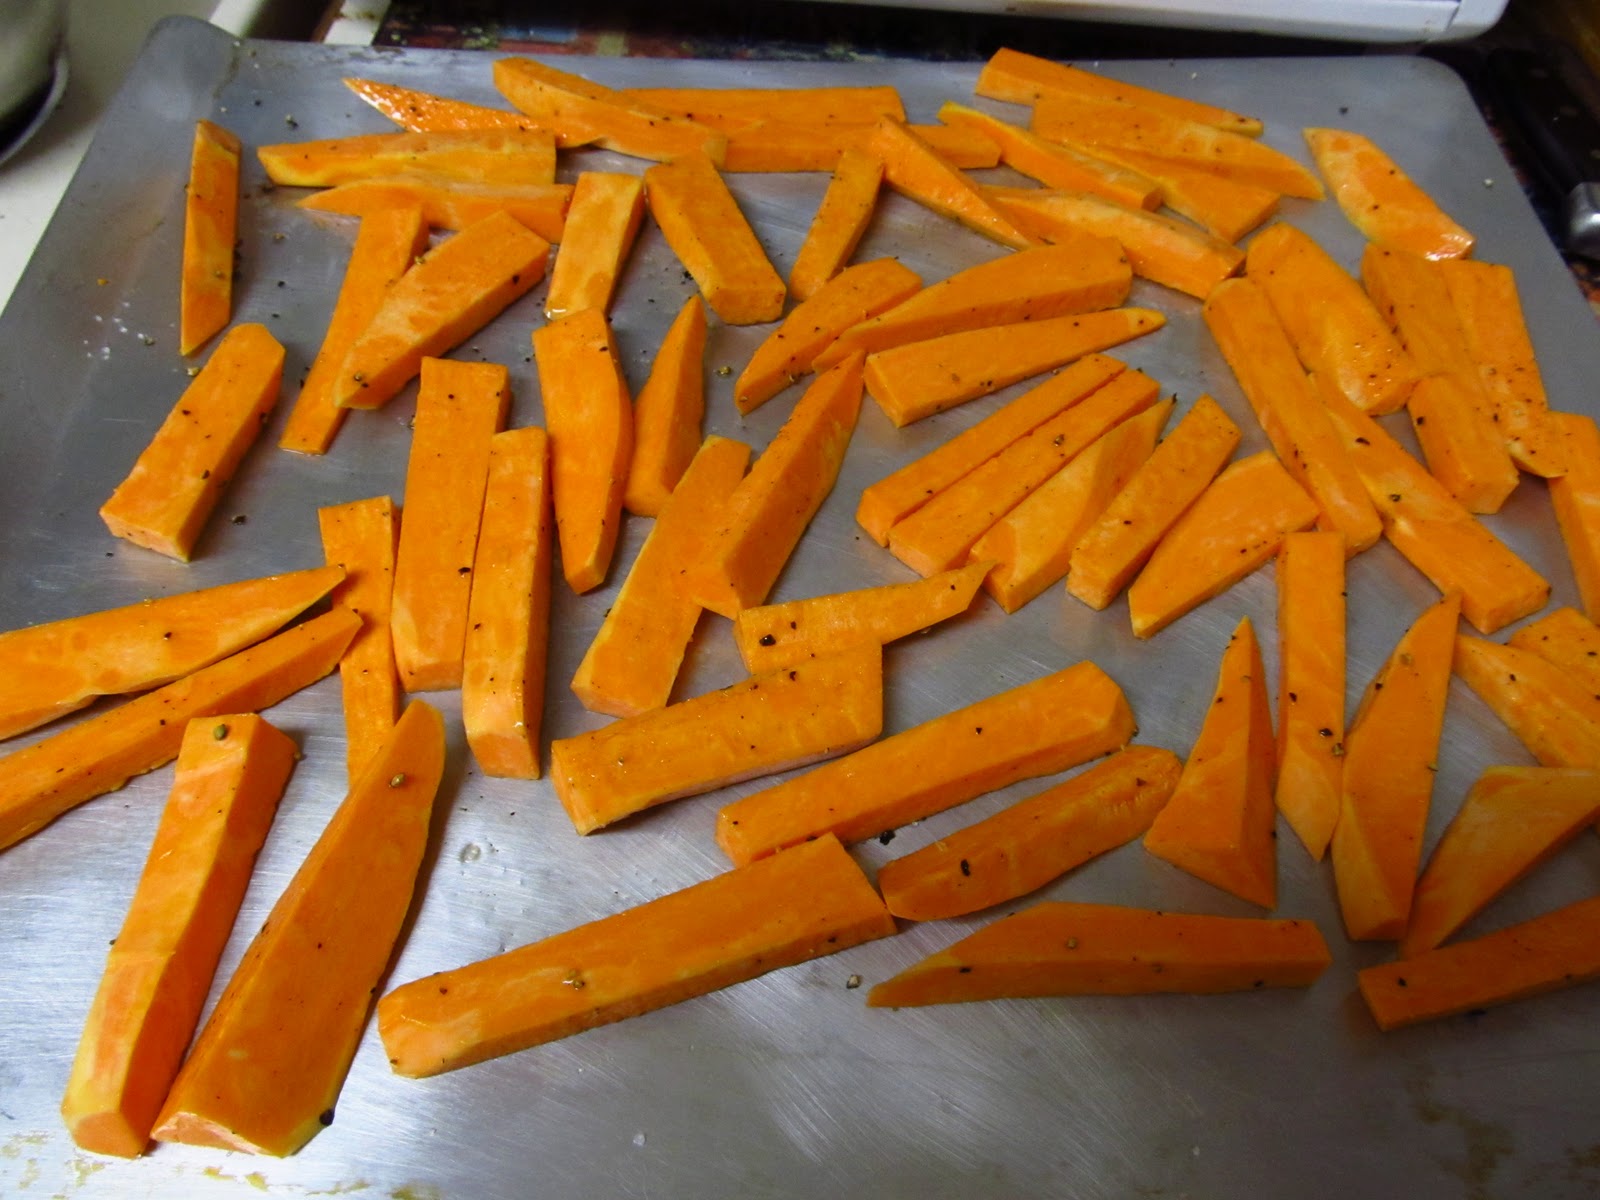
    Another favorite side dish for tonight were our sweet potato fries.  I call them fries, but they're baked, so I suppose you could call them roasted sweet potato sticks if you really like being technical.  One great thing about making these two things together is that with my oven and the baking trays I happen to use for these recipes I can get the chicken and the fries in there at the same time and they both turn out well!.

    (Sidenote:  If you ever want to see a cute kid stuff his face as fast as possible, just come over here when I make sweet potato fries.  I wish I had taken a video of Michael eating these things.  They're his favorite!  It's almost like he's trying to play chubby bunny with them.  Too bad he can't actually say, "Chubby bunny."  We'll have to try to teach him that next time.)

    The wing recipe isn't anything fancy and I didn't really get it from anywhere.  I suppose it accumulated in my brain after watching and reading about all the different ways to make breaded chicken.  I may have gleaned something from the back of the Frank's red hot bottle about how to spice up regular chicken wings though.  So here you have it.  Val's version for oven breaded wings.


    Wings!

    Ingredients
    1.5 pounds wings and drummettes
    1 cup buttermilk (or 1tbsp lemon juice + milk to make 1 cup)
    1 cup ground oats (magic bullet is great for this!)
    1 cup oat bran cereal (Jon's breakfast pulverized by magic bullet)
    1tbsp onion powder
    2tsp garlic powder
    salt and pepper to taste
    3tbsp butter
    3 tbsp hot sauce (we like Frank's)

    Method
    1.  In a medium bown mix together oats, cereal, onion powder, garlic powder, salt and pepper.

    2.  In another bowl combine wings and buttermilk.  Make sure the wings are well coated.

    3.  Take each wing and dredge it in the oat mixture and lay on a baking sheet covered with foil.

    4.  Bake wings in a 400 degree oven for 25 minutes.

    
    I know, I should have used a larger pan tonight.  I underestimated the size of the wings.
    
    5.  Melt the 3tbsp butter and after the wings have baked for 25 minutes drizzle them with 2tbsp butter.

    6.  For hot wings mix 1tbsp melted butter and the hot sauce, stir well, then drizzle over wings. 
    
    7.  Return wings to the oven for another 5 minutes.
    
    These are how Jon's hot wings turned out.  I neglected to get a pretty picture of them on his plate!

    Sweet Potato Fries (you can use yams too!)

    Ingredients
    2 large sweet potatoes cut into sticks (shaped like fries?  Ha ha!)
    2tbsp oil
    salt and pepper to taste

    Method
    1.  Toss sweet potatoes in oil and season with salt and pepper.

    2.  Put the sweet potatoes in the oven with your chicken on a separate rack!  Try to make sure they're on opposite sides of the oven so the sweet potatoes aren't covered.  Or just bake at 400 for 25 minutes.


    If you're baking your fries and the chicken wings at the same time make sure to check on the fries when your chicken wings are ready for their butter or hot sauce.  I wasn't so careful tonight and we ended up with a few blackened casualties.  It also helps if you cut your sweet potatoes in uniform shapes so that they all cook evenly.  I (as I think I have told you before) am not an expert at cutting things yet.  Good thing Jon likes the taste of burnt things.  How lucky am I?


    In the name of the Father, the Son, and the Holy Spirit, Amen.
    Dear Heavenly Father,
      thank you for the blessing of our children.  They bring such joy to our home and give us so many opportunities to grow in holiness.  Help us to see those opportunities and give us the grace to make use of them.  Amen.

    UIOGD